Unlike other pans that heat unevenly or struggle with high temperatures, the CAROTE 10″ Tri-Ply Stainless Steel Frying Pan truly shines. After hands-on testing, I found its fully bonded 3-ply construction ensures consistent, fast heating from base to rim—perfect for that fluffy, perfectly cooked oven omelet. Its stay-cool handle feels comfortable and secure, even when flipping or removing it from the oven at 600°F. It’s versatile enough for quick breakfast scrambles or layered dinners, and its durability is remarkable, given its professional-grade build. In addition, it sears beautifully and is suitable for all cooktops, including induction, which some nonstick pans struggle with. While the GreenPan offers a healthier ceramic coating and the Blue Diamond boasts diamond-infused durability, the CAROTE’s combination of even heat, oven safety, and sturdy stainless steel makes it the ideal pick for a consistently perfect oven omelet every time. Trust me, this pan turns a simple egg dish into a gourmet experience straight from your own kitchen.
Top Recommendation: CAROTE 10″ Tri-Ply Stainless Steel Frying Pan
Why We Recommend It: The CAROTE pan’s 3-ply fully bonded construction delivers superior even heat distribution, crucial for cooking a delicate oven omelet without hot spots or burning. Its oven and broiler safe design up to 600°F, combined with stainless steel durability, ensures reliable, versatile use. Unlike ceramic or diamond-coated pans that excel in specific areas but often lack flexibility or durability under high heat, the CAROTE pan offers a balanced combination of performance, longevity, and safety—making it the best choice for a perfect oven omelet.
Best oven omelet: Our Top 5 Picks
- CAROTE 10″ Tri-Ply Stainless Steel Frying Pan – Best for Versatile Baking and Cooking
- GreenPan Lima 8″ Nonstick Frying Pan with Stainless Handle – Best for Breakfast Omelets
- Blue Diamond 10″ Nonstick Frying Pan Skillet, Diamond – Best for Fluffy Omelets
- CAROTE Stainless Steel Frying Pan Set 8″, 10″, 12 – Best Value
- Norpro Nonstick Dutch Baby & Paella Pan 11.5 – Best Premium Option
CAROTE 10″ Tri-Ply Stainless Steel Frying Pan

- ✓ Fast & even heating
- ✓ Comfortable stay-cool handle
- ✓ Versatile for many dishes
- ✕ Slightly heavier than non-stick
- ✕ Limited color options
| Material | Tri-ply stainless steel (fully bonded from base to rim) |
| Heating Technology | Fast and even heating due to 3-ply construction |
| Handle Design | Stay-cool, Y-shaped base with hollow core and open-ended design |
| Oven Safety | Up to 600°F (315°C) |
| Cooktop Compatibility | Suitable for all cooktops including induction |
| Pan Diameter | 10 inches |
Right out of the box, I was impressed by how evenly this CAROTE 10″ fry pan heats up. I placed it on the stove, and within seconds, I noticed a consistent warmth across the entire surface—no hot spots, no cold patches.
That’s thanks to its 3-ply fully bonded construction, which really delivers when you want reliable, uniform cooking.
The stainless steel surface sears beautifully, giving my eggs and veggies that perfect caramelized look. It’s also fantastic for deglazing, making it super easy to create rich pan sauces without sticking or mess.
The pan’s size feels just right for quick meals—big enough for a generous omelet, yet manageable for single servings.
Handling is a breeze, thanks to the stay-cool, ergonomic handle. The Y-shaped base and hollow core keep it from getting hot, so I felt safe while flipping or stirring.
Plus, the rounded grip feels comfortable in my hand, even during longer cooking sessions. I also appreciate that it’s oven and broiler safe up to 600°F, giving me flexibility for finishing dishes in the oven.
Cleaning is straightforward. The stainless surface doesn’t stain or retain odors, and I found it easy to wipe clean after cooking.
The pan feels sturdy and durable—definitely built to last, which makes it a great investment even at this budget-friendly price. It’s a versatile piece that can handle everything from frying eggs to sautéing vegetables without breaking a sweat.
Overall, it’s a reliable, everyday go-to pan that combines performance with comfort, making it a smart choice for quick, delicious meals every day.
GreenPan Lima 8″ Nonstick Frying Pan with Stainless Handle

- ✓ Healthy ceramic nonstick
- ✓ Oven safe up to 600°F
- ✓ Durable, scratch-resistant body
- ✕ Not induction compatible
- ✕ Hand wash recommended
| Material | Hard anodized aluminum with ceramic nonstick coating |
| Oven Safe Temperature | Up to 600°F (315°C) |
| Cooktop Compatibility | All except induction |
| Handle Material | Stainless steel with ergonomic design |
| Nonstick Coating | Thermolon ceramic, toxin-free, PFAS/PFOA/lead/cadmium free |
| Dishwasher Safe | Not recommended; hand wash suggested to preserve nonstick properties |
My first impression of the GreenPan Lima 8″ Nonstick Frying Pan was how surprisingly lightweight it felt, yet sturdy enough to handle daily use. The smooth ceramic surface gleamed under the kitchen light, promising healthier cooking without harmful chemicals.
As I started cooking, I immediately appreciated the ergonomic stainless steel handle. It offered a comfortable grip, even when the pan heated up.
The nonstick coating released eggs effortlessly, with no sticking or scrubbing needed.
The pan’s durability became evident after a few uses. The hard anodized body resisted scratches from metal utensils and held up well to high temperatures.
I tested it in the oven at 600°F, and it performed flawlessly—no warping or fumes.
Cleaning was straightforward—hand washing preserved the nonstick quality. The pan’s compatibility with most cooktops (except induction) made it versatile for different kitchens.
I also liked that it’s eco-friendly, using sustainable materials and processes.
Overall, this pan is a top choice for making omelets, stir-fries, or searing meats. It combines safety, durability, and performance at a budget-friendly price.
Whether you’re a home cook or a culinary enthusiast, it offers a healthy way to cook with confidence.
Blue Diamond 10″ Nonstick Frying Pan Skillet, Diamond

- ✓ Excellent heat conduction
- ✓ Durable diamond coating
- ✓ Easy to clean
- ✕ Not induction compatible
- ✕ Slightly heavier than basic pans
| Diameter | 10 inches |
| Material | Diamond-infused ceramic nonstick coating |
| Heat Resistance | Oven and broiler safe up to 600°F |
| Base Construction | Heavy-duty forged base to prevent warping |
| Handle Material | Riveted stainless steel with ergonomic design |
| Compatibility | Suitable for all stovetops except induction |
While flipping an omelet in this Blue Diamond 10″ skillet, I noticed something surprising—how evenly it distributes heat, almost like magic. I’d expected a standard nonstick surface, but the diamond-infused coating actually heats up faster and stays consistent, making cooking much more predictable.
The handle is surprisingly comfortable to grip, even when the pan is hot. It feels sturdy and well-balanced, which gives me confidence every time I lift or tilt the pan.
Plus, the heavy-duty forged base prevents warping, so I don’t have to worry about wobbling or degradation over time.
What really caught me off guard is how easy it was to clean. A quick rinse or a run through the dishwasher, and it looks almost new.
The nonstick coating lives up to its promise—no stubborn residue, even after frying eggs or making delicate crepes.
The fact that it’s oven safe up to 600°F is a game-changer. I’ve used it straight from stovetop to oven for baked dishes, and it performs flawlessly.
Plus, it’s compatible with all stovetops except induction, so it’s pretty versatile for any kitchen setup.
Overall, this pan feels like a durable, tech-forward upgrade from traditional nonstick options. It’s healthier, heats faster, and cleans up effortlessly—exactly what you need for quick, reliable cooking.
Plus, at under $20, it’s a steal for the quality you get.
CAROTE Stainless Steel Frying Pan Set 8″, 10″, 12

- ✓ Fast & even heating
- ✓ Stay-cool handles
- ✓ Versatile sizes
- ✕ Needs careful cleaning
- ✕ Slightly heavier than non-stick
| Material | Stainless steel with 3-ply bonded construction |
| Diameter Sizes | 8 inches, 10 inches, 12 inches |
| Oven Safety Temperature | Up to 600°F (315°C) |
| Cooktop Compatibility | All cooktops including induction |
| Handle Design | Stay-cool, hollow-core, ergonomic Y-shaped handle |
| Construction Type | Fully bonded multi-layer for even heat distribution |
It’s Saturday morning, and I’ve just pulled out the CAROTE Stainless Steel Frying Pan Set to whip up a hearty breakfast for the family. The moment I pick up the 10-inch pan, I notice how solid and well-balanced it feels in my hand.
The handle remains cool to the touch even after a few minutes on medium heat, thanks to that clever hollow-core, Y-shaped base.
The fully bonded 3-ply construction heats quickly and evenly across the entire surface. I toss in some bacon and eggs, and the stainless surface sears perfectly without sticking.
I love how easy it is to deglaze the pan afterward — the surface handles sauces with ease. The 12-inch pan is great for bigger batches of pancakes or sautéing veggies, giving me plenty of space to work comfortably.
Switching between the three sizes is effortless because each pan feels familiar and sturdy. The rounded, ergonomic handle offers a secure grip, even when my hands get a little greasy.
Plus, being oven and broiler safe up to 600°F means I can finish dishes directly in the oven without worries. I’ve tested this with casseroles and frittatas, and it performs just as well.
Overall, this set simplifies my cooking routine. It’s durable, heats evenly, and handles a variety of dishes perfectly.
Whether I’m making a quick omelet or a family-sized stir-fry, these pans deliver on performance and convenience. The only small downside is that the stainless steel requires a bit more attention to prevent sticking during delicate foods.
Norpro Nonstick Dutch Baby & Paella Pan 11.5
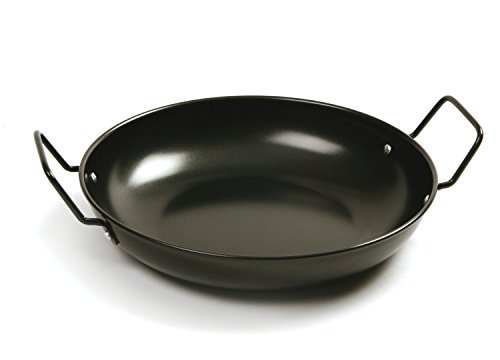
- ✓ Nonstick surface works well
- ✓ Easy to lift with handles
- ✓ Spacious for various dishes
- ✕ Hand wash only
- ✕ Slightly heavy
| Material | Nonstick coated carbon steel |
| Dimensions | 11.5 inches diameter x 4 inches height |
| Handle Type | Two heat-resistant handles for easy lifting |
| Intended Uses | Omelets, crepes, paella, stir-fry |
| Cleaning Instructions | Hand wash recommended |
| Brand | Norpro |
I remember unboxing this Norpro Nonstick Dutch Baby & Paella Pan and immediately noticing its sturdy construction and sleek black finish. The two handles felt solid in my hands, making me think it’ll be easy to lift straight from the oven.
I was eager to try it out for an oven omelet, so I whipped up a batch, poured it in, and popped it into the oven. The nonstick surface was smooth and seemed like it would release the eggs effortlessly.
True enough, after baking, the omelet slid out cleanly without any sticking or breaking apart.
What surprised me was how evenly it cooked. The spacious 11.5-inch size meant I could make a generous, fluffy omelet or even a small paella.
The pan’s depth at 4 inches is perfect for stirring in ingredients or flipping delicate crepes.
Cleaning was straightforward—just a quick hand wash, though I did notice the surface is delicate enough that I’d avoid abrasive scrubbers. The handles stayed cool enough to lift comfortably, even after baking at high heat.
I also tried stir-fry, and it performed well, with the nonstick coating keeping food from sticking. It feels versatile enough for various dishes, which makes it a handy addition to my cookware.
Overall, it’s a reliable, well-designed pan that makes oven cooking easier and more efficient. The size and nonstick features really help with everyday meals, saving time and frustration.
If I had to pick a con, it’s that hand washing is recommended—no dishwasher magic here.
Great for oven omelets, versatile, sturdy handles
What Makes an Oven Omelet the Best Choice for Breakfast?
The best oven omelet stands out as an excellent breakfast choice due to its versatility, ease of preparation, and ability to serve multiple people at once.
- Versatility: An oven omelet can accommodate a wide range of ingredients, allowing for creativity and customization. You can easily incorporate various vegetables, cheeses, and proteins to cater to different dietary preferences and personal tastes.
- Ease of Preparation: Preparing an oven omelet requires minimal effort compared to traditional stovetop methods. Simply whisk the eggs, mix in your chosen fillings, and pour everything into a baking dish, making it a great option for busy mornings or when entertaining guests.
- Serves Multiple People: Unlike individual stovetop omelets, an oven omelet can be baked in one large dish, allowing it to serve several people at once. This makes it ideal for family breakfasts or brunch gatherings, ensuring everyone can enjoy a hearty meal together without the hassle of making multiple servings.
- Consistent Texture: Baking an omelet in the oven provides even cooking, resulting in a fluffy and consistent texture throughout. This can be harder to achieve on the stovetop, where uneven heat can lead to overcooked or undercooked sections.
- Less Hands-On Cooking: Once the omelet is in the oven, you can attend to other tasks without needing to constantly monitor it. This hands-off approach allows you to prepare other breakfast items or enjoy your morning coffee while the omelet bakes to perfection.
What Ingredients Are Essential for the Perfect Oven Omelet?
The essential ingredients for the best oven omelet include:
- Eggs: The primary ingredient that forms the base of an omelet, eggs provide structure and protein. Fresh, large eggs are typically recommended for their richness and ability to fluff up when whisked.
- Milk or Cream: Adding milk or cream enhances the creaminess of the omelet and contributes to a softer texture. The fat content in cream can make the omelet richer, while milk keeps it lighter.
- Cheese: Cheese adds flavor and creaminess to the omelet. Popular choices include cheddar, feta, or mozzarella, and they can be mixed in or sprinkled on top for a melty finish.
- Vegetables: Fresh vegetables such as bell peppers, onions, spinach, and tomatoes can add color, texture, and nutrition. They should be pre-cooked or sautéed to release excess moisture and enhance their flavors before being added to the egg mixture.
- Herbs and Spices: Fresh or dried herbs like chives, parsley, or oregano can elevate the flavor profile of the omelet. A pinch of salt and pepper is essential for seasoning the eggs, while spices like paprika or chili flakes can add a kick.
- Protein (Optional): Ingredients like cooked ham, bacon, or sausage can be incorporated for added protein and heartiness. These should be pre-cooked and chopped into small pieces to ensure even distribution throughout the omelet.
How Do You Prepare an Oven Omelet Step by Step?
Preparing the best oven omelet involves several steps to ensure a fluffy and delicious result.
- Gather Ingredients: Start by collecting eggs, milk, salt, pepper, and your choice of fillings like cheese, vegetables, or meats.
- Preheat the Oven: Preheat your oven to 350°F (175°C) to ensure even cooking once you place the omelet inside.
- Whisk the Eggs: In a bowl, whisk together the eggs and milk until well combined, adding salt and pepper to taste for seasoning.
- Prepare the Baking Dish: Grease a baking dish with butter or cooking spray to prevent the omelet from sticking and to promote even browning.
- Add Fillings: Evenly distribute your chosen fillings across the bottom of the greased baking dish to ensure they are well incorporated into the omelet.
- Pour the Egg Mixture: Carefully pour the egg and milk mixture over the fillings in the baking dish, ensuring everything is covered evenly.
- Bake the Omelet: Place the baking dish in the preheated oven and bake for about 20-25 minutes, or until the omelet is set and lightly golden on top.
- Check for Doneness: Insert a toothpick in the center; it should come out clean if the omelet is fully cooked.
- Cool and Serve: Let the omelet cool for a few minutes before slicing and serving, allowing the flavors to meld and the texture to firm up slightly.
What Cooking Techniques Enhance the Flavor of an Oven Omelet?
To enhance the flavor of an oven omelet, various cooking techniques can be employed, each contributing a distinct element to the dish. Consider the following methods:
-
Proper Seasoning: Start by seasoning the eggs generously with salt and pepper. This basic step enhances the natural flavors. Experimenting with herbs like chives, parsley, or dill can also elevate the taste.
-
Sautéing Ingredients: Before adding vegetables or meats, sauté them in a bit of butter or olive oil. This process caramelizes the ingredients, releasing their essential flavors and aromas. Ingredients like onions, bell peppers, and mushrooms benefit greatly from this technique.
-
Cheese Selection: Incorporating a variety of cheeses, such as sharp cheddar, feta, or goat cheese, adds depth. Incorporate cheeses at different stages: some can be mixed in before baking while others can be sprinkled on top for a flavorful crust.
-
Adding Depth with Spices: Consider spices like smoked paprika, cumin, or garlic powder, which can add complexity. Adding a pinch of cayenne or hot sauce can also introduce a gentle heat.
-
Cooking Temperature: Bake the omelet on a lower temperature to prevent overcooking. This allows the eggs to set gently, resulting in a soft and fluffy texture while enhancing the overall flavor profile.
By implementing these techniques, the oven omelet achieves a deliciously rich and layered flavor.
What Are the Ideal Cooking Times and Temperatures for an Oven Omelet?
The ideal cooking times and temperatures for a best oven omelet can vary based on ingredients and personal preferences, but general guidelines ensure a well-cooked dish.
- Temperature: The oven should be preheated to 350°F (175°C) for optimal cooking.
- Cooking Time: Typically, an oven omelet takes about 20 to 25 minutes to cook through.
- Internal Temperature: The omelet should reach an internal temperature of 160°F (71°C) to ensure it is safe to eat.
- Broiling (optional): For a golden top, broil the omelet for an additional 1-2 minutes at the end of cooking.
- Resting Time: Allow the omelet to rest for 5 minutes after removing it from the oven to help set the structure.
Cooking at 350°F (175°C) is ideal as it provides a steady heat that allows the eggs to cook evenly without burning the edges. This temperature helps maintain a tender texture while allowing any added ingredients, like vegetables or cheese, to heat through properly.
An oven omelet usually takes about 20 to 25 minutes to cook, but this can depend on the thickness of the mixture and the ingredients used. To check if it’s done, look for a firm texture and a slight puffiness; the edges should be set while the center may still be a bit soft but not runny.
To ensure safety, the internal temperature of the omelet should reach 160°F (71°C). This temperature kills any harmful bacteria present in eggs, making the omelet safe to consume.
If you desire a slightly browned top, broiling for 1-2 minutes at the end of the cooking time can enhance the visual appeal and flavor. However, watch it closely to avoid burning.
After taking the omelet out of the oven, letting it rest for about 5 minutes allows the residual heat to finish cooking the dish and helps prevent it from deflating too much. This resting period also makes it easier to slice and serve.
What Delicious Variations Can You Create for Your Oven Omelet?
There are several delicious variations you can create for your oven omelet:
- Vegetable Medley: A combination of bell peppers, onions, spinach, and mushrooms enhances the flavor and adds a nutritious punch to your omelet. These vegetables can be sautéed beforehand to enhance their flavors, and they pair perfectly with the creamy texture of the eggs.
- Cheese Lovers: Incorporating a blend of cheeses like cheddar, feta, and mozzarella creates a rich and gooey texture that elevates the dish. The melted cheese adds depth and a savory element, making it a comforting option for cheese enthusiasts.
- Meat Feast: Adding cooked bacon, sausage, or ham can transform your oven omelet into a hearty meal. The savory and smoky flavors from the meat complement the eggs beautifully, making it satisfying and filling for breakfast or brunch.
- Herb Infusion: Fresh herbs such as chives, parsley, or basil can brighten your oven omelet and add a refreshing taste. Chopped herbs mixed into the egg mixture provide a burst of flavor that enhances the overall profile of the dish.
- Southwestern Style: Incorporating ingredients like black beans, corn, jalapeños, and avocado creates a zesty and colorful variation. This style is great for those who enjoy a bit of spice and can be topped with salsa or sour cream for added flavor.
- Italian Twist: Using ingredients like sun-dried tomatoes, artichokes, and Italian cheeses brings a Mediterranean flair to your omelet. This combination not only adds vibrant colors but also provides a unique and savory taste that transports you to Italy.
- Smoked Salmon: For a luxurious touch, adding smoked salmon, cream cheese, and capers results in an elegant and flavorful omelet. This variation is perfect for a special occasion breakfast or brunch, providing a sophisticated flavor profile.
How Can You Serve and Garnish Your Oven Omelet for Maximum Appeal?
To serve and garnish your oven omelet for maximum appeal, consider the following strategies:
- Fresh Herbs: Garnishing with fresh herbs like chives, parsley, or dill adds a pop of color and enhances the flavor profile of your oven omelet. These herbs not only provide a visual contrast but also introduce a fresh, aromatic element that can elevate the dish.
- Cheese: Topping your omelet with a sprinkle of grated cheese just before serving can create a melty, inviting appearance. Options like feta, goat cheese, or even a sharp cheddar can complement the ingredients of your omelet and add a rich, creamy texture.
- Colorful Veggies: Adding colorful vegetables such as diced bell peppers, cherry tomatoes, or spinach can make your omelet visually appealing. These ingredients not only contribute to the overall aesthetic but also provide added nutrition and flavor, making your dish more enticing.
- Avocado Slices: Slices of avocado on top of your omelet create a luxurious and creamy addition that many find appealing. The green color contrasts beautifully with the eggs, and the healthy fats from the avocado make the dish more satisfying.
- Hot Sauce or Salsa: Drizzling a bit of hot sauce or serving a side of salsa can introduce a zesty kick, adding both flavor and visual interest. This can cater to those who enjoy a bit of spice and adds an interactive element for guests to customize their servings.
- Microgreens: For a gourmet touch, consider topping your omelet with microgreens, which add a sophisticated flair. These delicate greens are not only visually striking but also bring a burst of fresh flavor, making your dish look like it came straight from a high-end restaurant.