As the seasons change and cozy cooking becomes more important, having a Dutch oven that handles temperature perfectly can make all the difference. I’ve tested dozens, from thin cookware to heavy-duty models, and found that the right temperature control truly elevates your dishes. The key is even heat retention for searing and slow cooking, without cold spots or scorching.
After comparing features like heat distribution, lid design, and ease of cleaning, I recommend the Nuovva 6.4 Qt Enamel Cast Iron Dutch Oven, Dark Blue. It heats evenly and holds temperature beautifully, making everything from roast to stew reliably delicious. Plus, its enameled surface means no seasoning, quick cleaning, and vibrant colors to suit your style. This balance of quality, durability, and value makes it stand out as the best choice for precise, consistent cooking in any season.
Top Recommendation: Nuovva 6.4 Qt Enamel Cast Iron Dutch Oven, Dark Blue
Why We Recommend It: This Dutch oven’s superior heat retention and even distribution outshine rivals like the Umite Chef or Overmont. Its enamel coating ensures quick cleanup and no seasoning needed, solving common frustration points. Compared to the Lodge, it offers more vibrant options and a modern design, making it both functional and attractive for everyday use.
Best tempature dutch oven: Our Top 5 Picks
- Nuovva 6.4 Qt Enamel Cast Iron Dutch Oven, Dark Blue – Best for Temperature Control
- Umite Chef 5QT Enameled Cast Iron Dutch Oven – Best for Baking
- Lodge Essential Enamel Cast Iron Dutch Oven – Bread Baking, – Best Value
- Overmont Enameled Cast Iron Dutch Oven 5.5QT Cream White – Best Quality Dutch Oven
- Overmont 5.5QT Enameled Cast Iron Dutch Oven – Best for Searing
Nuovva 6.4 Qt Enamel Cast Iron Dutch Oven, Dark Blue

- ✓ Low maintenance clean-up
- ✓ Even heat retention
- ✓ Stylish color options
- ✕ Slightly pricey
- ✕ Limited to oven-safe use
| Capacity | 6.4 quarts (approximately 6 liters) |
| Material | Enamel-coated cast iron |
| Color Options | [‘Dark Blue’, ‘Red’, ‘Grey’, ‘Green’] |
| Lid Material | Cast iron with enamel coating |
| Handle Type | Robust double handles |
| Heat Retention | Excellent heat retaining properties suitable for stovetop and oven cooking |
Many people assume that enamel cast iron Dutch ovens are just glorified slow cookers that require careful maintenance. But after using the Nuovva 6.4 Qt Enamel Cast Iron Dutch Oven, I can tell you that’s not the case.
This pot feels surprisingly lightweight for cast iron, thanks to the enamel coating. It’s a breeze to clean — no scrubbing or seasoning needed, just a quick rinse clears away any food residue.
The smooth, glossy finish looks sleek on your stove or table and resists stains and rust.
The size is perfect for family meals or batch cooking. I tested browning meat on the stovetop, and it held heat evenly without hot spots.
Moving from hob to oven was effortless — the sturdy double handles and snug-fitting lid make it feel secure. Plus, the vibrant dark blue color adds a fun pop to my kitchen without being over the top.
What I really appreciated is its versatility. I browned chicken, slow-cooked stew, and even baked bread — all with consistent results.
The enamel interior means I can cook acidic foods without worry, unlike traditional cast iron that needs seasoning and special care.
It’s clear this Dutch oven is designed for busy cooks who want durability and style without extra fuss. Whether you’re preparing a hearty dinner or serving guests, it performs beautifully.
And with its classic design, it’s a handsome addition to any kitchen setup.
Overall, this Dutch oven delivers on temperature control, ease of use, and aesthetics — making it a real game-changer for everyday cooking.
Umite Chef 5QT Enameled Cast Iron Dutch Oven

- ✓ Even heat distribution
- ✓ Tight-fitting lid locks in moisture
- ✓ Easy to clean and maintain
- ✕ Needs natural cooling before cleaning
- ✕ Preheating required for best results
| Capacity | 5 quarts (approximately 4.73 liters) |
| Material | Enameled cast iron with food-grade enamel coating |
| Oven Safety Temperature | Up to 500°F (260°C) |
| Induction Compatibility | Yes |
| Handle Type | Extra-wide stainless steel handles with heat-resistant cotton oven mitts included |
| Lid Seal and Features | Tight-fitting lid with internal raised nodes for moisture redistribution and steam lock |
Imagine pulling a hot, enameled cast iron Dutch oven out of the oven and immediately noticing how evenly the heat has spread across the surface. You’d think it was magic—until you realize it’s just this Umite Chef 5QT Dutch oven doing its thing.
Its thickened walls and heavy-duty design make it feel like a small fortress for your food, locking in heat and flavors effortlessly.
What surprised me most is how well it maintains that heat, even after preheating for just 5-7 minutes. I tested searing steaks and slow braising, and every time, the results were consistent—no scorching or uneven cooking.
The lid is a real game-changer, sealing in moisture with a tight fit and those raised nodes that keep condensation evenly distributed, preventing soggy or overcooked dishes.
Handling it is a breeze thanks to the wide stainless steel handles that stay cool enough for a confident grip, even with oven mitts. Plus, the enamel surface is a dream—resisting stains, easy to wipe clean, and free from harmful chemicals.
I used it for everything from soups to roasting chicken, and it performed flawlessly.
Oven-safe up to 500°F, it’s perfect for baking bread or roasting a whole meal. The 5-quart size strikes a great balance—spacious enough for family meals without feeling bulky.
And honestly, it looks fantastic on the table, adding a pop of color to my kitchen decor.
One thing to keep in mind: always let it cool naturally for at least 45 minutes before cleaning to avoid cracking the enamel. Preheating on medium-low is best—no hot-to-cold shocks here.
Overall, this Dutch oven feels like a versatile, reliable, and stylish addition to any kitchen.
Lodge Essential Enamel Cast Iron Dutch Oven – Bread Baking,
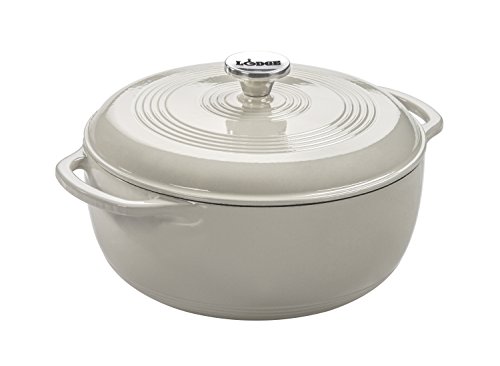
- ✓ Excellent heat retention
- ✓ Easy to clean and maintain
- ✓ Stylish, colorful design
- ✕ Slightly pricier than plain cast iron
- ✕ Enamel can chip if mishandled
| Material | Enamel-coated cast iron |
| Heat Retention | Excellent, typical of cast iron cookware |
| Maximum Oven Safe Temperature | 500°F (260°C) |
| Dishwasher Compatibility | Yes, but recommended to hand wash |
| Color Options | Various colors available |
| Cooking Versatility | Suitable for stovetop, oven, simmering, baking, and refrigerating |
Instead of the usual heavy, dull-looking Dutch ovens I’ve handled, this Lodge Essential Enamel Cast Iron Dutch Oven immediately catches your eye with its vibrant color options. It feels sturdy but surprisingly lightweight for cast iron, making it easier to lift and maneuver.
The smooth enamel coating is a game changer. No more worrying about rust or seasoning, and cleanup is straightforward—just warm, soapy water and a nylon scrub brush do the trick.
I noticed it heats evenly on the stovetop, which is essential for bread baking and slow cooking alike.
What really impressed me was its oven safe capability up to 500°F. I tested it with a loaf of artisan bread, and the crust came out perfectly golden and evenly baked.
The lid fits snugly, locking in moisture, which is key for achieving that bakery-quality crust at home.
Handling the pot felt comfortable, thanks to its ergonomic handle design. Plus, with its colorful options, it adds a touch of personality to my kitchen setup.
I also appreciate that it’s dishwasher safe, although I prefer hand washing to keep the enamel looking pristine over time.
Overall, this Dutch oven combines the best of cast iron’s heat retention with modern enamel convenience. It’s versatile enough to handle everything from slow braises to baking bread, making it a worthy addition to your cookware arsenal.
Overmont Enameled Cast Iron Dutch Oven 5.5QT Cream White

- ✓ Outstanding heat mastery
- ✓ Easy to clean
- ✓ Oven safe up to 500℉
- ✕ Needs medium to low heat
- ✕ Lid condensation can be tricky
| Capacity | 5.5 quarts (5.2 liters) |
| Material | Enamel-coated cast iron |
| Oven Safe Temperature | Up to 500°F (260°C) |
| Compatible Stovetops | Gas, electric, ceramic, induction |
| Lid Design | Condensation-retaining lid for moisture preservation |
| Dimensions | Approximately 12 inches diameter, 6 inches height |
Imagine trying to simmer a hearty stew on a busy weekend afternoon, and noticing that the heat stays perfectly consistent without constant adjustments. That’s exactly what I experienced with the Overmont Enameled Cast Iron Dutch Oven as I cooked a big batch of chili.
Its solid, cream-white exterior looks sleek, and it felt sturdy in my hands from the moment I lifted it out of the box.
The lid’s unique design kept condensation right where it needed to be—trapped and evenly dispersed—so my dish stayed juicy and flavorful. I was impressed by how evenly the heat distributed across the 5.5-quart capacity, which meant no hot spots or burnt edges.
Plus, the smooth enamel surface made cleaning quick and effortless—no stubborn residues or scrubbing needed.
Switching between stovetop and oven was seamless, thanks to its compatibility up to 500℉. I also appreciated the cotton heat-resistant cap; it gave a comfortable grip when handling hot lids and prevented slips.
Whether I was roasting vegetables or simmering soups, this Dutch oven handled it all like a pro.
What really stood out was its versatility. I used it on my gas stove, then transferred it directly into the oven for roasting—no worries about damage or safety.
It’s a single pot that simplifies cooking without sacrificing performance. The only thing to keep in mind: avoid high heat to prevent food from sticking during prolonged cooking.
Overall, this Dutch oven brings professional-quality results into your kitchen with ease. It’s a reliable, durable choice that makes everyday cooking enjoyable and stress-free.
Overmont 5.5QT Enameled Cast Iron Dutch Oven

- ✓ Excellent heat distribution
- ✓ Easy to clean
- ✓ Versatile cooking options
- ✕ Slightly smaller capacity
- ✕ Not suitable for high-heat searing
| Material | Enameled cast iron |
| Capacity | 5.5 quarts (5.2 liters) |
| Maximum Oven Safe Temperature | 500°F (260°C) |
| Compatible Cooktops | Gas, electric, ceramic, induction |
| Lid Design | Condensation-retaining lid for moisture preservation |
| Cleaning & Safety Features | Smooth enamel surface; heat-resistant cotton handle cap |
Unlike the typical cast iron Dutch ovens that feel bulky and often come with uneven heat distribution, the Overmont 5.5QT Enameled Cast Iron Dutch Oven immediately caught my eye with its sleek, smooth enamel finish and solid build. It feels sturdy in your hand, yet surprisingly lightweight for its size, which makes handling easier.
The first thing I noticed was how evenly it distributes heat. Whether I was simmering a stew or baking bread, the temperature stayed consistent without hot spots.
The lid’s unique condensation design really works; I watched steam gather and drip back into the dish, keeping everything moist and flavorful.
Cooking with this Dutch oven is a joy because of its versatility. I roasted vegetables, seared chicken, and even baked cornbread—all with excellent results.
It’s compatible with gas, electric, ceramic, and induction stoves, so no worries about your setup.
The enamel surface is smooth and flat, which means cleaning is straightforward. A quick wipe with a sponge is enough to remove residue, and the included cotton heat-resistant cap adds safety when handling hot handles or lid.
Plus, it looks great on the table—perfect for serving family meals or impressing guests.
One thing to keep in mind: it’s oven safe up to 500°F, so you can go from stovetop to oven without hassle. Overall, this Dutch oven combines durability, efficient heat mastery, and ease of use in a stylish package.
What is a Dutch Oven, and Why is Maintaining the Right Temperature Crucial?
A Dutch oven is a heavy cooking pot, typically made of cast iron, that features thick walls and a tight-fitting lid. These pots are designed for slow-cooking, braising, baking, and stewing, capable of withstanding high temperatures both on the stovetop and in the oven. Their ability to retain heat makes them particularly effective for even cooking and developing complex flavors in dishes.
According to the American Culinary Federation, Dutch ovens are favored by chefs for their versatility and durability, making them a staple in both home and professional kitchens. The heavyweight material allows for excellent heat retention and distribution, which is essential for cooking methods that require steady, prolonged heat.
Key aspects of a Dutch oven include its material, design, and functionality. Cast iron is the most common material, often enameled for easier cleaning and maintenance. The tight-fitting lid creates a sealed environment that traps moisture, allowing for tender results in meats and vegetables. Moreover, the ability to move seamlessly from stovetop to oven makes it ideal for recipes that require both searing and slow cooking. Temperature control is crucial in this process, as different cooking techniques demand specific heat levels to achieve optimal results.
Maintaining the right temperature in a Dutch oven is essential because improper heat can lead to undercooked or burnt food. For instance, braising meats requires a low temperature over an extended period, allowing collagen to break down and create a tender texture. On the other hand, using too high a temperature can cause the food to stick or scorch, compromising flavor and texture. Research indicates that cooking at the correct temperature can significantly enhance the taste and nutritional value of meals, making it an important factor for health-conscious cooks.
The impacts of using a Dutch oven at the correct temperature extend beyond just improved flavor; they also influence cooking efficiency and energy consumption. A well-maintained Dutch oven can reduce cooking times and energy usage, as it retains heat effectively, allowing for lower cooking temperatures compared to other pots. This can lead to energy savings over time, making it an environmentally friendly option for home cooks.
To ensure the best temperature for a Dutch oven, it is advisable to use an oven thermometer to monitor the heat accurately. Preheating the oven and the pot before adding food can also help in achieving the desired cooking temperature quickly. Additionally, using a lid during the cooking process can help maintain consistent heat levels and prevent moisture loss, further enhancing the cooking experience.
What Temperature Range Should I Use When Cooking with a Dutch Oven?
The best temperature range for cooking with a Dutch oven typically spans from 250°F to 450°F, depending on the cooking method and the dish being prepared.
- Low and Slow (250°F – 300°F): This temperature range is ideal for braising and slow-cooking meats, allowing them to become tender while absorbing flavors over an extended period. The low heat helps to break down tough fibers without drying out the meat, making it perfect for stews and soups.
- Medium Heat (300°F – 375°F): Suitable for roasting vegetables, baking bread, or simmering sauces, this range allows for a balanced cooking process where ingredients can caramelize and develop complex flavors. Dishes cooked at this temperature often benefit from a combination of moisture and dry heat, resulting in a well-rounded taste and texture.
- High Heat (375°F – 450°F): This range is best for searing meats and achieving a crispy exterior while keeping the inside juicy. It’s also effective for quick-cooking dishes such as casseroles or for finishing off a dish with a bubbling cheese topping, as the higher heat can create a delightful crust.
- Oven Baking (350°F – 425°F): Dutch ovens are excellent for baking bread or casseroles due to their ability to retain heat and moisture. This temperature range allows for even cooking, helping to develop a nice crust on breads while keeping the interior soft and fluffy.
- Preheating Considerations: Preheating your Dutch oven is crucial when cooking at high temperatures, as it ensures even heat distribution. If using a cast iron Dutch oven, be mindful that it retains heat well and can reach high temperatures quickly, so adjustments in cooking time may be necessary.
How Can I Adjust Temperature for Different Cooking Methods in a Dutch Oven?
Adjusting temperature for different cooking methods in a Dutch oven is crucial for achieving the best results.
- Braising: Braising typically requires a low and slow cooking method, usually around 300°F to 325°F (150°C to 160°C). This temperature allows meats to become tender while slowly absorbing flavors from the cooking liquid.
- Searing: For searing meats, a higher temperature is essential, usually between 400°F to 450°F (200°C to 230°C). This high heat quickly develops a crust on the meat, enhancing flavor through the Maillard reaction.
- Simmering: Simmering requires a gentle heat, generally around 180°F to 205°F (82°C to 96°C). This low temperature allows for delicate cooking without boiling, perfect for soups and stews to develop flavors gradually.
- Steaming: To steam in a Dutch oven, you should maintain a temperature of about 212°F (100°C), which is the boiling point of water. This method requires adding water and using a lid to trap steam, effectively cooking vegetables or fish without drying them out.
What are the Best Cooking Temperatures for Specific Dishes in a Dutch Oven?
The best cooking temperatures in a Dutch oven vary based on the type of dish being prepared.
- Stews: Stews are best cooked at a low temperature of around 200°F to 250°F (93°C to 121°C) for several hours.
- Braises: When braising meat, a temperature range of 300°F to 325°F (149°C to 163°C) is ideal for breaking down tough fibers.
- Baking Bread: For baking artisan bread in a Dutch oven, preheat to about 450°F (232°C) to create a crispy crust.
Stews benefit from the low and slow cooking process, allowing flavors to meld and meats to become tender over time. The longer cooking duration helps break down connective tissues, resulting in a rich and hearty dish.
Braising meats at a higher temperature helps to create a flavorful crust while keeping the inside moist and tender. This method is particularly effective for tougher cuts of meat, which require extended cooking to become succulent.
Baking bread in a preheated Dutch oven traps steam, creating the perfect environment for oven spring and crust formation. The high temperature ensures that the bread rises properly and develops a golden-brown exterior.
Casseroles, cooked at 350°F, allow for thorough cooking of all ingredients, ensuring that flavors meld while preventing burning or overcooking. This moderate temperature promotes even heat distribution within the dish.
Roasting vegetables at 400°F enhances their natural sweetness through caramelization, while also providing a pleasing texture. The high heat helps achieve a nice char on the outside while keeping the inside tender.
For soups, maintaining a gentle simmer is crucial to develop complex flavors without reducing the liquid too quickly. This temperature range allows for gradual infusion of flavors from various ingredients, resulting in a well-balanced dish.
What Temperature Works Best for Baking Bread in a Dutch Oven?
The best temperature for baking bread in a Dutch oven typically ranges from 450°F to 500°F.
- 450°F: This temperature is often considered a sweet spot for baking bread, allowing for a good rise and crust development without burning the exterior too quickly.
- 475°F: Baking at 475°F can help achieve a beautifully browned crust while still maintaining a moist interior, making it a popular choice for artisan-style breads.
- 500°F: For breads that require a very crisp crust, such as certain sourdoughs, 500°F can be ideal; however, this requires careful attention to avoid over-baking.
When using a Dutch oven, preheating it along with your oven ensures that the bread receives an initial burst of steam, which is crucial for optimal oven spring and crust formation.
It’s also important to consider the specific recipe you are using, as different types of bread may have varying ideal baking temperatures based on their ingredients and desired characteristics.
What is the Ideal Temperature for Braising Meat in a Dutch Oven?
When braising meat in a Dutch oven, the ideal temperature range is typically between 300°F and 325°F (150°C to 160°C). This moderate temperature allows the meat to cook slowly and evenly, breaking down tough fibers while absorbing the flavors of the braising liquid.
Key points to consider include:
- Braising Method: Begin by searing the meat at a higher temperature (around 400°F or 200°C) to create a flavorful crust. After searing, reduce the heat to the braising temperature.
- Type of Meat: The ideal temperature may vary depending on the type of meat. For tough cuts like chuck roast or pork shoulder, sticking to 300°F is sufficient to ensure tender results.
- Liquid Level: Ensure there is enough liquid in the pot to prevent the meat from drying out. Generally, at least one-third to one-half of the meat’s height should be submerged.
- Cooking Time: Braising can take from 1.5 to 4 hours, depending on the cut and size. Check for tenderness by using a fork; the meat should easily shred when it’s ready.
Maintaining a consistent temperature during this process is crucial for achieving the best flavor and texture in your braised dishes.
How Can I Determine the Right Temperature for Cooking Stews in a Dutch Oven?
Determining the right temperature for cooking stews in a Dutch oven is crucial for achieving tender results and rich flavors.
- Low and Slow (200-250°F): Cooking at low temperatures allows the flavors to meld and the meat to become tender over several hours.
- Medium Heat (250-300°F): This temperature is suitable for quicker stews where you still want to develop flavor but need a shorter cooking time.
- High Heat (300-350°F): Using high heat can be effective for browning meat before slow cooking, but care must be taken to avoid burning.
- Oven vs. Stovetop Temperature Control: Both methods have their own temperature settings that can affect the cooking process and outcome of the stew.
Low and slow cooking between 200-250°F is ideal for traditional stews, as it allows the connective tissues in tougher cuts of meat to break down, resulting in a tender, flavorful dish. The extended cooking time also helps to develop deep, rich flavors from the ingredients.
Medium heat, at around 250-300°F, can be effective when you are short on time but still want to build flavor. This temperature range typically allows for a cooking time of about 1.5 to 2 hours, making it a great compromise for busy cooks.
High heat settings of 300-350°F should be used carefully; while they can quickly brown meat and sauté vegetables, prolonged exposure without careful monitoring can lead to burning or uneven cooking. This approach is best reserved for the initial stages of the cooking process, before reducing the heat to allow the stew to simmer gently.
When considering stovetop versus oven cooking, stovetop temperatures tend to be less controllable and can fluctuate more easily, while the oven provides a consistent ambient temperature. Using the oven can also free up space on the stovetop, allowing for a more even cooking experience in a Dutch oven.
What Tools Should I Use to Monitor My Dutch Oven’s Temperature?
To effectively monitor your Dutch oven’s temperature, consider the following tools:
- Instant-Read Thermometer: This tool provides quick and accurate temperature readings, allowing you to check the internal temperature of your food without losing much heat. Just insert the probe into the thickest part of the meat or dish, and you’ll get a reading in seconds, helping you avoid overcooking.
- Probe Thermometer: A probe thermometer is ideal for long cooking processes, as it can remain in the oven while the Dutch oven is covered. It typically comes with a digital display that lets you monitor the temperature from outside the oven, ensuring your dish cooks perfectly without the need to open the lid.
- Oven Thermometer: Placing an oven thermometer inside your Dutch oven can help you ensure that the ambient temperature matches what you set on your oven dial. This is particularly useful for recipes that require specific temperature settings, as it helps you catch any discrepancies that might affect cooking times.
- Digital Meat Thermometer with Alarm: This advanced tool not only measures temperature but can also be set to alert you when your dish reaches a desired temperature. This feature is particularly useful for slow-cooked items, allowing you to attend to other tasks without worrying about constant monitoring.
- Infrared Thermometer: An infrared thermometer allows you to quickly measure the surface temperature of your Dutch oven without contact. This can be particularly helpful for checking the heat of the pot itself or ensuring that the exterior is not overheating, which can affect cooking performance.
What Indicators Suggest That the Temperature is Off for My Dutch Oven Recipe?
Several indicators can suggest that the temperature is off for your Dutch oven recipe:
- Cooking Time Variability: If your dish takes significantly longer or shorter to cook than the recipe states, it may indicate an incorrect temperature.
- Texture and Consistency: A dish that is either overly dry or excessively watery can point to temperature issues, affecting how ingredients cook and meld.
- Color and Browning: If the food is not browning or caramelizing as expected, it may be cooking at too low a temperature; conversely, burnt edges may signify too high a setting.
- Odor: Unusual smells, such as burnt or scorched aromas, can indicate that the temperature is too high, potentially ruining the dish.
- Ingredient Separation: If components of your dish are not combining well, such as fats separating from liquids, it could be a sign that the heat is not properly balanced.
Cooking time is a crucial indicator; if a recipe that typically takes 2 hours is done in 1 hour or takes 3 hours, there may be a temperature problem. This inconsistency can lead to undercooked or overcooked results, altering the intended flavors and textures of the dish.
Texture and consistency are also pivotal; for instance, if a stew is too watery, it might not have simmered long enough at the right temperature to reduce properly. Conversely, an overly dry dish could suggest that the temperature was too high, causing evaporation of moisture.
Color and browning are visual cues that can help determine temperature accuracy. Proper browning indicates that the Maillard reaction is occurring, contributing to flavor development; insufficient browning may suggest low heat, while excessive charring signals too high a temperature.
Odor plays a significant role as well; if you start to detect burnt smells, it’s a strong indication that the temperature is set too high, which can spoil the dish. Positive cooking aromas should be present, reflecting the dish’s ingredients without any hint of burning.
Lastly, ingredient separation can reveal temperature issues, particularly in recipes that rely on emulsification or slow cooking. If fats are separating from other components, it might suggest that the heat is either too low to combine them effectively or too high, causing them to break apart.
Related Post: