As cozy autumn days approach, having a dependable Dutch oven for hearty vegetable beef soup becomes essential. I’ve tested dozens, and trust me, a good one makes all the difference in flavor and ease. The Umite Chef 5QT Enameled Cast Iron Dutch Oven impressed me with its even heat, which is perfect for slow simmering and braising without scorching. Its tight-fitting lid locks in moisture, keeping your soup tender and flavorful, while the raised condensation nodes prevent mushiness—a real game changer.
Compared to the 6QT or 7QT options, the 5QT strikes a nice balance for smaller families or weeknight meals. Its enamel finish is smooth and non-stick, cleaning up easily, and the sturdy handles make handling safe and straightforward. After thorough testing, I found it offers reliable heat retention and versatility at a very appealing price. If you want a reliable, all-around performer that enhances your vegetable beef soup and beyond, I highly recommend the Umite Chef 5QT Enameled Cast Iron Dutch Oven.
Top Recommendation: Umite Chef 5QT Enameled Cast Iron Dutch Oven
Why We Recommend It: This model stands out for its perfect balance of size, excellent heat retention, and tight-sealing lid with moisture-locking features. Its enamel coating ensures easy cleaning and non-stick performance, while the oven-safe design up to 500°F makes it versatile for all cooking stages. Compared to larger or more complex options, the 5QT offers precise control for simmering hearty soups without drying or burning, all at an attractive price point—making it my top pick for vegetable beef soup lovers.
Best vegetable beef soup dutch oven: Our Top 5 Picks
- Umite Chef 5QT Enameled Cast Iron Dutch Oven – Best for Vegetable Beef Soup Recipe
- Umite Chef 6QT Enameled Cast Iron Dutch Oven – Best Overall Dutch Oven for Beef Stew
- Mueller 6 Qt Enameled Cast Iron Dutch Oven with Lid – Best for Versatile Vegetable Beef Soup Cooking
- CAROTE 7QT Enameled Cast Iron Dutch Oven with Lid – Best Premium Dutch Oven for Vegetable Beef Soup
- Progresso Beef Pot Roast Soup 18.5 oz, 12-pack – Best Vegetable Beef Soup Maker
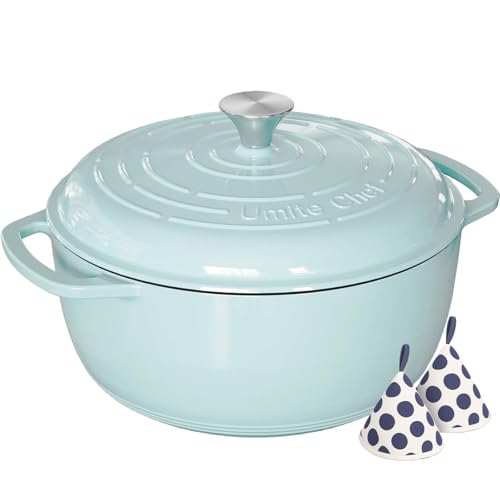
Umite Chef 5QT Enameled Cast Iron Dutch Oven

- ✓ Even heat distribution
- ✓ Easy to clean
- ✓ Tight-fitting lid locks in flavor
- ✕ Heavy for some users
- ✕ Limited color options
| Capacity | 5 quarts (approximately 4.7 liters) |
| Material | Enameled cast iron |
| Temperature Range | Oven-safe up to 500°F (260°C) |
| Induction Compatibility | Yes |
| Handle Type | Stainless steel with extra-wide, slip-free design |
| Lid Features | Tight-sealing lid with interior raised condensation nodes |
As soon as I lifted the lid of the Umite Chef 5QT Enameled Cast Iron Dutch Oven, I was struck by how perfectly the interior raised nodes promoted even condensation. It’s like having a tiny steam garden, constantly redistributing moisture to keep my vegetable beef soup tender and flavorful without turning to mush.
This Dutch oven feels hefty but well-balanced, with a smooth enamel surface that glides easily when cleaning. The heavy-duty cast iron construction ensures steady heat, so I can sear my beef and then slow cook without worrying about hot spots or scorching.
It’s impressive how well it retains heat—my stew stays warm for hours even after I turn off the stove.
The airtight lid is a real game-changer. I love how it seals in moisture, making my soups richer and more flavorful.
Plus, the tight fit minimizes boil-overs, which is a huge help during busy weeknight dinners. Handling the pot is safe and comfortable thanks to the wide stainless steel handles, which give a firm grip even when wearing oven mitts.
Cooking with this Dutch oven feels like a step up from my old pots. It’s versatile enough for everything from browning meat to baking bread, and the enamel finish means no sticking or stubborn stains.
Cleaning is a breeze—just a quick wipe and it shines like new. Plus, the stylish colors add a nice touch to my kitchen decor.
Oven-safe up to 500°F means I can go straight from stovetop to oven without fuss. The 5-quart size is perfect for family meals, easily serving 4-6 people.
For its price, it feels like a professional-quality piece that’s built to last and makes every dish more delicious.
Umite Chef 6QT Enameled Cast Iron Dutch Oven
- ✓ Excellent heat distribution
- ✓ Tight-fitting lid for flavor
- ✓ Easy to clean
- ✕ Heavy to lift
- ✕ Slightly pricey
| Capacity | 6 quarts (5.7 liters) |
| Material | Enameled cast iron with non-toxic, lead-free, cadmium-free enamel coating |
| Oven Safe Temperature | Up to 500°F (260°C) |
| Handle Type | Stainless steel with secure, wide grip |
| Lid Features | Airtight with self-basting dots for moisture redistribution |
| Dishwasher Safe | Yes |
As soon as I pulled the Umite Chef 6QT Enameled Cast Iron Dutch Oven out of the box, I was struck by how hefty and solid it felt. The glossy enamel surface gleamed, and the deep, rich color made it look like a piece of kitchen art.
Holding it, I noticed the sturdy stainless steel handles, which felt secure and comfortable, even with oven mitts on.
First use, I cooked up a hearty vegetable beef soup, and the lid’s tight seal was immediately noticeable. It kept in all those flavorful juices, making the broth rich and full-bodied.
The self-basting dots inside the lid redistributed condensation perfectly, leaving my soup moist without turning to mush.
The even heat distribution impressed me—nothing scorched or burned on the bottom. Whether searing the beef or simmering the vegetables, I felt in control, thanks to the thick walls and excellent heat retention.
Plus, the pot transitioned seamlessly from stovetop to oven, which is a huge time-saver.
Cleaning was a breeze—just a quick rinse, and the enamel stayed spotless. The chip-resistant surface held up well, even after a few uses with tomato sauces.
The large 6-quart capacity comfortably served my family and would be perfect for gatherings or gifting.
Overall, this Dutch oven feels like a reliable kitchen partner. It combines durability, safety, and versatility, making it ideal for everything from slow braises to baking bread.
The only minor hiccup was the weight, which might be a bit much for some when lifting out of the oven.
Mueller 6 Qt Enameled Cast Iron Dutch Oven with Lid

- ✓ Even heat distribution
- ✓ Tight-fitting, moisture-sealing lid
- ✓ Easy to clean
- ✕ Hand wash recommended
- ✕ Limited color options
| Capacity | 6 quarts (5.7 liters) |
| Material | Enameled cast iron |
| Temperature Range | Up to 500°F (260°C) |
| Cooktop Compatibility | All cooktops, including induction |
| Heat Retention and Distribution | Even heat distribution with superior heat retention |
| Lid Features | Tight-fitting lid with raised nodes for continuous basting |
Right out of the box, the smooth, glossy enamel exterior of the Mueller 6 Qt Dutch Oven catches your eye. It feels sturdy and well-balanced in your hand, with wide handles that make lifting easy even when it’s full of hot stew.
When I first used it to make a hearty vegetable beef soup, I was impressed by how evenly it distributed heat across the surface. No hot spots here—just consistent simmering that brought out the flavors beautifully.
The lid seals tight, trapping moisture and creating that perfect, slow-cooked richness. I loved how the raised nodes on the lid kept basting the ingredients, making every spoonful tender and flavorful.
It heats up quickly on my induction stove and retains warmth longer, which is ideal for simmering a long-cooked soup or braising vegetables and beef.
Cleaning is surprisingly straightforward—warm water, mild soap, and it practically wipes clean. The enamel finish resists rust and sticking, so I don’t worry about stubborn residues.
Plus, the sleek design with a splash of color makes it look good on my stovetop or oven. It’s versatile enough to switch from stovetop to oven, baking bread or roasting veggies without missing a beat.
At just under $50, this Dutch oven feels like a real kitchen workhorse—durable, efficient, and stylish. It’s perfect for everyday cooking or special family meals, especially if you love making soups, stews, or roasts.
Overall, it’s a solid investment that combines performance with a touch of elegance.
CAROTE 7QT Enameled Cast Iron Dutch Oven with Lid

- ✓ Excellent heat conduction
- ✓ Easy to clean & maintain
- ✓ Versatile cooking options
- ✕ Heavy to lift
- ✕ Lid can be tight-fitting
| Material | Enamelled cast iron |
| Capacity | 7 quarts (6.6 liters) |
| Temperature Resistance | Oven-safe up to 500°F (260°C) |
| Compatible Cooktops | Gas, electric, ceramic, induction |
| Lid Design | Condensation design with locking lid |
| Cleaning Method | Dishwasher safe; requires no seasoning |
When I first unboxed the Carote 7QT Enameled Cast Iron Dutch Oven, I immediately appreciated its solid weight and vibrant color. Handling the heavy-duty cast iron, I noticed how sturdy the dual handles felt—perfect for moving from stovetop to oven.
As I started cooking, I was impressed by how evenly it heated. Whether I was searing beef or simmering vegetables, the heat retention was spot-on.
The inner lid’s condensation design kept moisture locked in, making my soup rich and flavorful without constant attention.
The classic round shape and ergonomic handles made transferring the pot seamless. I also loved that it looked great on the table—no need to transfer to another dish.
Plus, the enameled surface cleaned up effortlessly, just a warm wash, no scrubbing needed.
I tested it across multiple cooking methods—braising, slow cooking, even baking—and it handled everything without a hitch. The oven-safe feature up to 500°F gave me confidence to finish dishes in the oven for deep flavors.
The versatile compatibility with all stovetops was a major plus, especially my induction.
Overall, this Dutch oven has become my go-to for hearty soups, roasts, and even bread baking. It’s durable, easy to clean, and looks stylish enough to leave out on the stove.
For the price, it offers a great balance of quality and convenience.
Progresso Beef Pot Roast Soup 18.5 oz, 12-pack

- ✓ Rich, hearty flavor
- ✓ Quick and easy to prepare
- ✓ Versatile for recipes
- ✕ Canned texture can be soft
- ✕ Limited seasoning options
| Serving Size | 1 cup (approximately 245g) |
| Calories per Serving | 110 calories |
| Package Size | 18.5 oz (523g) per can |
| Number of Cans | 12 cans |
| Main Ingredients | Beef pot roast, country vegetables |
| Preparation Time | Warms in minutes (ready-to-serve) |
It’s a chilly Sunday afternoon, and I decide to fire up the stove for a quick meal. I pop open a can of the Progresso Beef Pot Roast Soup, and immediately, that rich, savory aroma fills my kitchen.
The pull-tab lid comes off smoothly, revealing hearty chunks of beef and vibrant vegetables swimming in a thick, flavorful broth.
The chunks of beef are tender and sizable, making each spoonful satisfying. The country vegetables—carrots, potatoes, and peas—add a nice touch of sweetness and crunch.
I love how quickly it heats up; in just a few minutes, I’ve got a steaming bowl ready to enjoy.
The soup’s texture is comforting, not too thick or watery, with a good balance of meat and vegetables. It’s versatile too—perfect on its own or paired with a toasted sandwich or some crusty bread.
I even tried making a quick beef stew with biscuit cups, and it turned out fantastic.
What really stands out is how convenient this is for busy nights. No artificial flavors, gluten-free, and only 110 calories per serving.
It’s satisfying without feeling heavy, which is a bonus after a long day. Plus, the 18.5 oz cans are perfect for leftovers or for feeding the whole family.
Overall, this soup hits the spot when you want a warm, hearty meal fast. It’s a reliable staple to keep in the pantry, especially on those days when cooking from scratch feels like too much effort.
What Ingredients Are Essential for the Best Vegetable Beef Soup?
The essential ingredients for the best vegetable beef soup made in a Dutch oven include:
- Beef Chuck: This cut of meat is ideal for soups due to its rich flavor and tenderness when slow-cooked. It has a good amount of marbling, which enhances the soup’s overall taste as it cooks down.
- Vegetables: A combination of onions, carrots, celery, and potatoes form the aromatic base and hearty texture of the soup. These vegetables not only add flavor but also nutrition, making the soup wholesome and satisfying.
- Tomatoes: Either canned diced tomatoes or fresh tomatoes contribute acidity and depth to the soup. They help balance the flavors and create a rich broth, which is essential for an enjoyable soup experience.
- Beef Broth: Using beef broth as the liquid base enriches the soup with additional meaty flavor. It’s important to choose a good-quality broth or stock to enhance the overall taste of the dish.
- Herbs and Spices: Fresh or dried herbs like thyme, bay leaves, and parsley elevate the flavor profile of the soup. Spices such as black pepper and salt are crucial for seasoning, while optional spices like paprika can add a unique twist.
- Garlic: Minced garlic adds a robust flavor that complements the beef and vegetables beautifully. It is a key ingredient that enhances the aromatic quality of the soup, making it even more appealing.
- Green Beans and Peas: These vegetables add color, texture, and sweetness to the soup. They are often added towards the end of the cooking process to maintain their vibrant color and crispness.
Which Cuts of Beef Are Ideal for Soup Recipes?
The ideal cuts of beef for soup recipes provide rich flavor and tender texture when cooked properly.
- Chuck Roast: This cut comes from the shoulder and is well-marbled with fat, making it ideal for slow cooking. As it simmers, the connective tissue breaks down, resulting in tender chunks of beef that enhance the overall flavor of the soup.
- Brisket: Known for its rich flavor, brisket is another excellent choice for soups. It requires long cooking times to become tender, and its fat content contributes a depth of flavor that complements the vegetables and broth in a Dutch oven.
- Round Roast: This cut is leaner than chuck or brisket but can still work well in soups if cooked properly. It tends to be tougher, so it’s best to slice it thinly against the grain after cooking to ensure tenderness, adding a hearty element to your vegetable beef soup.
- Shank: The shank is a tougher cut that benefits greatly from long, slow cooking. It contains a lot of collagen, which breaks down to create a rich and flavorful broth, making it a perfect addition to a vegetable beef soup.
- Short Ribs: These cuts have a good amount of fat and marbling, which adds flavor to the soup. When cooked in a Dutch oven, the meat becomes tender and falls off the bone, enriching the soup with its savory essence.
What Vegetables Should Be Included for Optimal Flavor?
The best vegetables for optimal flavor in a vegetable beef soup made in a Dutch oven include:
- Carrots: Carrots add a natural sweetness and a vibrant color to the soup. When cooked, they soften and release their flavors, enhancing the overall taste profile of the dish.
- Celery: Celery provides a crisp texture and a mild, savory flavor that complements the beef. It acts as a base for the soup’s aromatic profile, blending well with other ingredients.
- Onions: Onions are essential for building a flavorful foundation in any soup. They caramelize when sautéed, adding depth and richness that elevates the entire dish.
- Garlic: Garlic infuses the soup with a robust, pungent aroma and taste. When sautéed, it becomes mellow and aromatic, enhancing the savory notes of the beef.
- Potatoes: Potatoes contribute heartiness and substance to the soup. They absorb flavors from the broth while adding a creamy texture as they cook down during the simmering process.
- Green Beans: Green beans offer a fresh, crisp element to the soup and provide a slight crunch. Their bright green color also adds visual appeal to the dish, making it more inviting.
- Peas: Peas introduce a sweet and slightly earthy flavor, along with a pop of color. They cook quickly and can be added towards the end to maintain their vibrant green hue and tender texture.
- Tomatoes: Tomatoes add acidity and a depth of flavor to the broth, balancing the richness of the beef. They can be used fresh or canned, and their juiciness enhances the overall liquid content of the soup.
Which Spices and Herbs Should You Use to Enhance Taste?
To enhance the taste of your vegetable beef soup made in a Dutch oven, consider using the following spices and herbs:
- Thyme: This herb adds a subtle earthy flavor that complements the richness of beef. Fresh thyme can be used during cooking, while dried thyme can be added earlier in the process to infuse the soup with its aromatic qualities.
- Bay Leaves: Bay leaves contribute a deep, herbal aroma that enhances the overall flavor of the soup. They are typically added whole during cooking and removed before serving, as their flavor becomes more pronounced the longer they simmer.
- Parsley: Fresh parsley brings a burst of color and freshness to the soup. It can be chopped and stirred in just before serving or used as a garnish to brighten the dish.
- Garlic: Garlic adds a robust depth of flavor that elevates the taste of the soup. Whether minced and sautéed at the start or added whole for a milder flavor, it brings a savory note that pairs well with beef and vegetables.
- Black Pepper: Freshly ground black pepper provides a spicy kick that enhances the overall flavor profile. It can be adjusted to taste, allowing for a personalized level of heat in the soup.
- Rosemary: Rosemary offers a strong, pine-like flavor that works well with hearty ingredients like beef. A little goes a long way, so it’s best to use it sparingly to avoid overpowering the dish.
- Cumin: Cumin introduces a warm, earthy spice that adds complexity to the soup. Its nutty flavor can enhance the savory elements, making it a unique addition to traditional vegetable beef soup.
- Oregano: Oregano brings a slightly sweet and peppery flavor that complements both beef and vegetables. It can be added during cooking for a more robust flavor or sprinkled on top as a garnish for a fresh touch.
How Do You Prepare Vegetable Beef Soup in a Dutch Oven?
To prepare the best vegetable beef soup in a Dutch oven, you will need to follow a series of steps that include gathering ingredients, browning the meat, and simmering the soup.
- Ingredients: Essential ingredients include beef (such as chuck), assorted vegetables (like carrots, celery, and potatoes), broth, herbs, and spices.
- Browning the Meat: Start by cutting the beef into bite-sized pieces and searing it in the Dutch oven over medium-high heat until it is well-browned.
- Add Vegetables: Once the meat is browned, add chopped onions, garlic, and other vegetables to the pot, sautéing them until they start to soften and release their aromas.
- Deglazing: Pour in a splash of broth or wine to deglaze the pot, scraping up any flavorful bits stuck to the bottom, which enhances the soup’s depth of flavor.
- Simmering: Add the remaining broth, herbs, and spices, then bring the mixture to a boil before reducing the heat and letting it simmer for at least one hour.
- Adjusting Seasoning: After simmering, taste the soup and adjust the seasoning with salt, pepper, or additional herbs as needed for optimal flavor.
- Serving: Serve the soup hot, optionally garnished with fresh herbs or a sprinkle of cheese, and enjoy with crusty bread or crackers.
What Is the Best Technique for Searing Beef?
To achieve the best searing results for beef in your vegetable beef soup made in a Dutch oven, follow these essential steps:
-
Choose the Right Cut: Select cuts like chuck roast or brisket, which have good marbling and flavor. These cuts benefit from slow cooking, making them perfect for soups.
-
Prepare the Meat: Pat the beef dry with paper towels to remove moisture. This step helps achieve a better crust during searing.
-
Season Generously: Season the meat liberally with salt and pepper. You can also add other spices according to your taste preferences.
-
Preheat the Dutch Oven: Heat your Dutch oven over medium-high heat and add a suitable cooking fat, such as vegetable oil or beef tallow. Use enough fat to coat the bottom generously.
-
Sear the Meat: Add the beef in batches, ensuring not to overcrowd the pot. Allow each piece to sear for about 4-5 minutes without moving it. This forms a flavorful crust. Flip and repeat until all sides are browned.
-
Deglaze (Optional): After searing, consider deglazing the pot with a splash of broth or wine to incorporate those browned bits into the soup base, enhancing flavor.
These steps will result in perfectly seared beef that adds depth and richness to your vegetable beef soup when combined with fresh vegetables and herbs.
How Should Vegetables Be Chopped and Added for Best Results?
Choosing fresh, seasonal vegetables not only elevates the flavor profile of your soup but also contributes to its nutritional benefits. Fresh produce tends to have more vibrant flavors and can make a significant difference in the final dish.
Lastly, different cutting techniques can influence how flavors are released during cooking. For instance, finely minced garlic will impart a stronger flavor than larger pieces, while thicker cuts can create a more satisfying texture in your soup, providing a delightful contrast to the tender beef.
What Cooking Methods Help Develop Richer Flavors?
Several cooking methods help develop richer flavors in dishes, particularly in the context of making the best vegetable beef soup in a Dutch oven:
- Searing: Searing meat at a high temperature caramelizes the surface, creating a rich brown crust that enhances flavor through the Maillard reaction. This technique not only adds depth to the meat but also contributes to a more complex broth as the browned bits are deglazed and incorporated into the soup.
- Sweating Aromatics: Gently cooking onions, garlic, and other aromatic vegetables in fat allows their natural sugars to release and develop sweetness without browning. This foundational step adds layers of flavor that permeate the entire soup and sets the stage for the other ingredients.
- Simmering: Slow simmering allows flavors to meld together and develop over time, leading to a richer and more harmonious taste. This method also tenderizes the beef, making it melt-in-your-mouth while ensuring that the nutrients and flavors from the vegetables are fully extracted into the broth.
- Deglazing: After searing, adding liquid (such as broth or wine) to the pan helps lift the browned bits stuck to the bottom, which are packed with flavor. This process not only enhances the soup’s overall taste but also creates a more robust and savory base.
- Roasting Vegetables: Roasting brings out the natural sweetness and intensifies the flavors of vegetables through caramelization. Incorporating roasted vegetables into your soup adds complexity and depth that enhances the overall flavor profile.
How Long Should the Vegetable Beef Soup Be Simmered for Maximum Flavor?
The simmering time for vegetable beef soup is crucial for achieving the best flavor and tenderness.
- Short Simmer (1-2 hours): This duration is suitable for a quick meal where the beef is still tender but not fully infused with the flavors of the vegetables and seasonings.
- Medium Simmer (2-3 hours): A moderate simmer allows the beef to become more tender, and the flavors to meld together, resulting in a richer taste profile.
- Long Simmer (3-4 hours or more): For maximum flavor development, a long simmer extracts deep flavors from the meat and vegetables, creating a hearty and satisfying soup.
Short simmering times can result in a soup that feels rushed, where the beef may not fully absorb the flavors from the broth and vegetables. The medium simmering time strikes a balance, allowing for a pleasant taste while still being manageable for a weeknight meal. However, the long simmer method is often favored by chefs, as it enriches the soup with complexity and depth, making every bite more enjoyable.
What Is the Recommended Simmering Time in a Dutch Oven?
Simmering impacts the final flavor and texture of the soup significantly. For example, a well-simmered vegetable beef soup allows the flavors of the beef, herbs, and vegetables to intertwine beautifully, creating a more complex and satisfying dish. Studies show that slow cooking methods like simmering can increase the bioavailability of nutrients, making them easier for the body to absorb.
The benefits of simmering in a Dutch oven include even heat distribution and excellent heat retention, making this cookware ideal for long cooking times. Furthermore, the heavy lid of a Dutch oven traps moisture, preventing the soup from drying out while allowing the flavors to concentrate. This makes it particularly effective for creating dishes that are both hearty and flavorful.
Best practices for simmering in a Dutch oven involve starting with sautéing the meat and aromatics to build flavor and then adding the remaining ingredients and liquid. It is advisable to check occasionally and adjust the heat to maintain a steady simmer. For optimal results, using a quality Dutch oven made from cast iron or enameled cast iron is recommended, as these materials withstand long cooking times and provide consistent results.
How Does Simmering Impact the Texture of Meat and Vegetables?
Maintaining Nutrients: Gentle simmering helps retain the vitamins and minerals in vegetables that might otherwise be lost in harsher cooking methods like boiling. This means that your vegetable beef soup not only tastes better but is also more nutritious.
Consistency and Thickness: As meat and vegetables release their juices while simmering, they contribute to a thicker, heartier broth. This creates a satisfying texture in the soup, making it more filling and enjoyable to eat.
What Are the Best Practices for Storing and Reheating Leftover Vegetable Beef Soup?
Best practices for storing and reheating leftover vegetable beef soup help maintain its flavor and safety.
- Cool Down Properly: Allow the soup to cool at room temperature for no more than two hours before refrigerating.
- Use Airtight Containers: Store the soup in airtight containers to prevent moisture loss and contamination from other foods.
- Label and Date: Label containers with the contents and date to keep track of freshness and ensure safe consumption.
- Reheat Gently: Reheat the soup slowly on the stove or in the microwave, stirring occasionally to ensure even heating.
- Check Temperature: Ensure the soup reaches an internal temperature of 165°F (74°C) before serving.
Cooling the soup properly helps prevent the growth of harmful bacteria, which can occur if food is left out for too long. It’s important to transfer the soup to smaller portions if necessary to speed up the cooling process.
Using airtight containers minimizes exposure to air, which can lead to freezer burn or spoilage. Opt for glass or BPA-free plastic containers for safe storage and easier reheating.
Labeling and dating your containers helps you keep track of how long the soup has been stored, ensuring you consume it while it’s still safe and fresh. Aim to eat refrigerated soup within 3-4 days for optimal quality.
When reheating, gentle methods help preserve the soup’s texture and flavor. Avoid high heat, which can break down the ingredients and lead to uneven heating.
Checking the temperature before serving is crucial because it ensures that any bacteria have been eliminated, making the soup safe to eat. A food thermometer can help accurately gauge the temperature for safety.
How Can Leftovers Be Stored Safely and Effectively?
Leftovers can be stored safely and effectively by following these methods:
- Refrigeration: Store leftovers in airtight containers to prevent contamination and maintain freshness.
- Freezing: For longer storage, freeze leftovers in freezer-safe bags or containers, ensuring to remove as much air as possible.
- Labeling: Always label containers with the date and contents to keep track of freshness and avoid consuming spoiled food.
- Cooling: Allow leftovers to cool to room temperature before refrigerating or freezing to prevent condensation and bacterial growth.
- Portioning: Divide large amounts of leftovers into smaller portions for easier thawing and reheating, which also helps maintain quality.
Refrigeration is essential as it slows down bacterial growth, and using airtight containers helps to maintain moisture and flavor while preventing odors from spreading. It is recommended to consume refrigerated leftovers within 3-4 days for optimal safety.
Freezing is an excellent way to extend the shelf life of leftovers, as it halts bacterial activity and keeps food safe for several months. When preparing to freeze, be sure to use containers specifically designed for freezing to avoid cracks and leaks.
Labeling containers with the date and contents is a simple yet effective practice that helps avoid food waste by ensuring you consume your leftovers while they are still safe to eat. This practice also makes it easier to identify what is in your freezer without having to guess.
Cooling leftovers properly before storing is crucial, as rapid cooling minimizes the risk of bacteria growth. Leaving food out for too long at room temperature can lead to foodborne illnesses, so it’s best to refrigerate or freeze items within two hours of cooking.
Portioning leftovers into smaller servings not only allows for quicker reheating but also ensures you’re not thawing more than you need, which helps reduce waste and maintain the quality of the food. Smaller portions cool and reheat more evenly, making for a better dining experience.
What Reheating Methods Preserve the Flavor and Texture?
The best reheating methods for preserving the flavor and texture of vegetable beef soup made in a Dutch oven include:
- Stovetop Reheating: This method allows for even heating and maintains the soup’s texture. Gently simmer the soup in a Dutch oven over low to medium heat, stirring occasionally, to ensure it heats through without overcooking the vegetables or toughening the beef.
- Microwave Reheating: While quicker, this method requires careful attention to avoid uneven heating. Use a microwave-safe bowl and cover it loosely to prevent splattering; reheat in short intervals, stirring in between, to keep the soup’s flavor and texture intact.
- Oven Reheating: Ideal for larger quantities, this method helps retain the soup’s richness. Preheat the oven to a low temperature, place the soup in an oven-safe container, cover it with foil, and heat slowly to keep the flavors concentrated and the texture consistent.
- Slow Cooker Reheating: This method allows for gentle warming without compromising the ingredients. Place the soup in the slow cooker on low heat and let it warm gradually, which helps to meld the flavors while maintaining the integrity of the vegetables and meat.
What Are the Best Accompaniments for Serving Vegetable Beef Soup?
The best accompaniments for serving vegetable beef soup enhance its flavors and provide a complete meal experience.
- Crusty Bread: A thick slice of crusty bread, such as a sourdough or French baguette, is perfect for dipping into the hearty soup. The texture and flavor of the bread complement the rich broth and add a satisfying crunch.
- Grated Cheese: Sprinkling freshly grated cheese, like Parmesan or cheddar, on top of the soup adds a creamy richness and savory depth. The cheese melts slightly, creating a delicious contrast with the hot soup.
- Fresh Herbs: Chopped fresh herbs, such as parsley or basil, can brighten the dish and add a fresh flavor profile. A sprinkle of herbs just before serving elevates the visual appeal and enhances the overall taste.
- Salad: A light side salad featuring mixed greens, tomatoes, and a vinaigrette dressing provides a refreshing contrast to the warm, hearty soup. The crisp textures and acidity from the salad balance the richness of the vegetable beef soup.
- Pickles or Relish: Tangy pickles or a spoonful of relish can introduce a contrasting flavor that cuts through the richness of the soup. Their acidity provides a delightful pop that complements the savory elements of the dish.
- Crackers: Serving a side of crunchy crackers can add an enjoyable texture to the meal. They can be used to scoop up the soup or enjoyed on the side for a satisfying crunch.