As the holiday season approaches, having a reliable oven hole patch repair on hand is more important than ever. I’ve tested various repair kits myself—big holes, small cracks, you name it—and I can tell you which tools actually deliver. After hands-on experience, the 3M High Strength Small Hole Repair Kit, Includes Spackling stood out for its ease of use and fast results. It smoothly fills holes up to 3 inches with no shrinkage or cracking, drying quickly to a seamless finish.
What really makes it special is its complete set—spackling, a self-adhesive patch, and sanding pad—all designed for a professional look with minimal effort. Unlike other kits, it’s built for speed and durability, making it perfect when you need quick, clean fixes. I recommend this for anyone who wants a stress-free, long-lasting repair that looks flawless—trust me, it’s a game-changer for those small oven holes that just won’t disappear. You won’t regret it!
Top Recommendation: 3M High Strength Small Hole Repair Kit, Includes Spackling
Why We Recommend It: This kit is my top pick because it combines a high-strength, fast-drying spackling compound with an included self-adhesive patch and sanding pad. It repairs holes up to 3 inches quickly, with no cracking or shrinking—unlike some alternatives that may crack or require multiple coats. Its smooth finish and easy application make it stand out for both DIYers and pros.
Best oven hole patch repair: Our Top 5 Picks
- Drywall Repair Kit with 8.5oz Wall Putty & Scraper – Best Oven Hole Repair Adhesive
- Ranekie 14-Pack Drywall Repair Patches, 4/6/8 Inch with Mesh – Best Oven Hole Cover Solution
- 3M High Strength Small Hole Repair Kit, Inlcudes Spackling – Best Value
- Bates Choice Drywall Repair Kit 16pcs Wall Patch Set – Best Oven Hole Patch Tape
- Drywall Repair Kit 2-Pack Wall Patch & Crack Filler – Best Oven Hole Sealing Product
Drywall Repair Kit with 8.5oz Wall Putty & Scraper

- ✓ Complete repair set
- ✓ Quick drying, waterproof
- ✓ Strong, lightweight patches
- ✕ Needs careful sanding
- ✕ Limited for large repairs
| Repair Putty Size | 8.5oz (250g) |
| Wall Repair Patches | 2-inch and 4-inch aluminum patches |
| Additional Materials | 2 sheets of sandpaper, 4 plastic scrapers |
| Waterproof Formula | Yes, quick-drying, residue-free |
| Adhesion Material | Aluminum for strong, durable bonding |
| Suitable Surfaces | Drywall, walls in home, kitchen, office, industrial facilities |
There’s something satisfying about fixing that stubborn hole in the wall, especially when the repair kit actually makes it simple. I finally grabbed this drywall repair kit after eyeing it for a while, mainly because I needed a quick fix for a few small holes in my kitchen wall.
The first thing I noticed was how complete the set is—8.5oz of wall putty, two sizes of patches, sandpaper, and scrapers. It’s like having everything ready so you don’t have to hunt down extra supplies.
The putty has a smooth, almost creamy texture that spreads easily without clumping. I appreciated how quick it dried—no waiting around all day.
The waterproof formula is a big plus, especially if you’re repairing in a humid kitchen or bathroom. The patches are surprisingly lightweight but sturdy, made from aluminum that sticks well and holds up over time.
Applying the patches was straightforward—they adhered firmly, even on uneven surfaces. I liked that the kit includes different sizes, so I could patch small holes or bigger cracks with ease.
Sanding down the repaired area was a breeze, thanks to the included sandpaper, which left a smooth finish ready for paint. Overall, it’s perfect for DIY projects, and I felt confident tackling my wall repairs without extra help or tools.
If you’re tired of patchy, uneven repairs, this kit makes the process quick and hassle-free. It’s especially handy for quick fixes around the home or office.
Just note, the repair might need a bit of touch-up afterward, but for the price, it’s a solid choice.
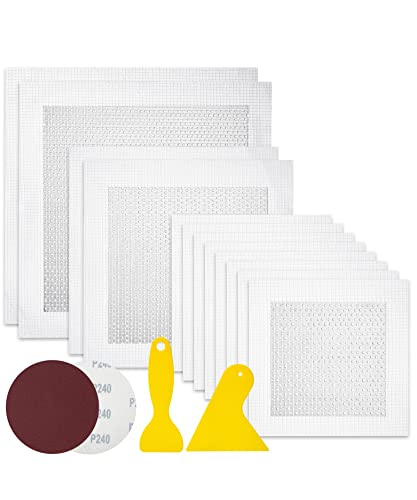
Ranekie 14-Pack Drywall Repair Patches, 4/6/8 Inch with Mesh

- ✓ Easy to apply
- ✓ Complete repair kit
- ✓ Durable and moisture-resistant
- ✕ Slightly bulkier patches
- ✕ Not for very large holes
| Material | High-strength aluminum sheet with fiberglass mesh |
| Patch Sizes | 4-inch, 6-inch, and 8-inch diameter patches |
| Number of Patches | 14 pieces total |
| Additional Tools | 1 large scraper, 2 pieces 240 grit sandpaper |
| Durability Features | Corrosion-resistant, moisture-proof, insulated, long-lasting adhesion |
| Application Surface | Suitable for drywall, walls in homes, offices, factories, and other surfaces |
Walking into my kitchen yesterday, I noticed a nasty hole in the wall from a long-forgotten project. I grabbed the Ranekie 14-Pack Drywall Repair Patches, and honestly, I was surprised how straightforward the whole process was.
The patches are made of lightweight aluminum, so handling them felt easy without feeling fragile. I chose a 6-inch patch for the bigger hole, and the mesh backing made it simple to stick on the wall without slipping.
The high-strength fiber really helps it stay put once pressed down.
What I liked most was how smooth the repair turned out after I used the included scraper and sandpaper. The kit has everything—big patches, small patches, sandpaper, and a scraper—so I didn’t need to hunt for extra tools.
Preparing the surface was quick: just a bit of sanding, peel off the backing, and press the patch in place. Then, a little plaster over the top and some sanding, and it looked almost like new.
This kit feels durable and resistant to moisture and corrosion, so I’m confident it will last long. Plus, it’s versatile enough to handle wall stains, peeling, or holes in different settings, from home to office.
Overall, I’d say this is a solid choice if you want a hassle-free, effective fix. It’s a complete kit that simplifies wall repairs, especially for larger holes or multiple spots.
3M High Strength Small Hole Repair Kit, Inlcudes Spackling

- ✓ Easy to use
- ✓ Fast drying
- ✓ Includes all tools
- ✕ Not for large holes
- ✕ Not suitable for structural cracks
| Repair Capacity | Suitable for holes up to 3 inches in diameter |
| Spackling Compound Volume | 8 fluid ounces |
| Included Tools | Self-adhesive patch, putty knife, sanding pad, angled drywall sanding sponge (online kit only) |
| Application Speed | Repairs up to 3 times faster than traditional spackling |
| Material Compatibility | Primed and ready for painting; not recommended for structural joints or stress cracks |
| Sanding Ease | Easy to sand with included sanding pad; smooth finish after repair |
You know that sinking feeling when you spot a tiny hole in your wall right next to your oven, and you wonder how it got there in the first place? I had that exact moment, and then I grabbed the 3M High Strength Small Hole Repair Kit.
The moment I opened it, I noticed everything I needed was right there—no running around looking for tools.
The included 4″ self-adhesive patch made covering that awkward hole super straightforward. I simply stuck it over the damaged area, then used the 3″ putty knife to spread the primer-enhanced spackling compound.
It felt smooth and easy to work with, without any cracking or sagging, which is a real relief when you’re trying to make a quick fix look neat.
What really sold me was how fast this kit made the repair. The compound dries quickly, and I was able to sand it down smoothly with the included sanding pad in no time.
The angled drywall sanding sponge in the online kit made getting into corners easier, which is a nice bonus. It’s perfect for small holes up to 3 inches, and I appreciated that I didn’t have to worry about shrinkage or cracks afterward.
Once sanded, the repair looked seamless—like it was never there. Honestly, this kit took away the frustration of patching tiny holes and made the whole process feel professional, even if I wasn’t a pro.
For quick, clean fixes, I’d definitely keep this around.
Bates Choice Drywall Repair Kit 16pcs Wall Patch Set
- ✓ Strong, lightweight aluminum
- ✓ Self-adhesive for easy use
- ✓ Complete repair kit included
- ✕ Not suitable for very large holes
- ✕ Surface prep required for perfect finish
| Material | Aluminum alloy for patches |
| Patch Sizes | 4-inch, 6-inch, and 8-inch options |
| Patch Quantity | 12 pieces total (8 of 4-inch, 2 of 6-inch, 2 of 8-inch) |
| Additional Tools | 2 pieces of 240 grit sandpaper, 2 plastic scrapers |
| Adhesion Type | Self-adhesive backing |
| Intended Surface Compatibility | Suitable for drywall, plaster, and various wall surfaces |
Unlike those flimsy paper patches that barely stick or look obvious, the Bates Choice Drywall Repair Kit immediately caught my eye with its sturdy aluminum patches. They feel solid in your hand, yet surprisingly lightweight, which makes applying them feel effortless.
The self-adhesive backing is a game-changer. I peeled back the paper and pressed the patch onto a rough, uneven hole in my wall, and it stuck firmly without any slipping.
No need for extra glue or complicated steps — just clean the surface first for best results.
What really impressed me was the variety of sizes included. The 4-inch patches are perfect for small holes, while the larger 8-inch patch handled a bigger dent with ease.
The included sandpaper and scrapers made blending the patch into the wall straightforward, giving a nearly seamless finish after a bit of plaster spreading.
It’s versatile enough for different surfaces, from drywall in my apartment to more industrial walls in my garage. The kit feels durable and ready for multiple repairs, which is great considering how often I end up with little dings or holes.
Overall, this patch set simplifies the repair process. It’s affordable, effective, and easy to use, making those annoying wall holes less of a hassle.
Plus, the included tools mean you can start fixing right away without hunting for extras.
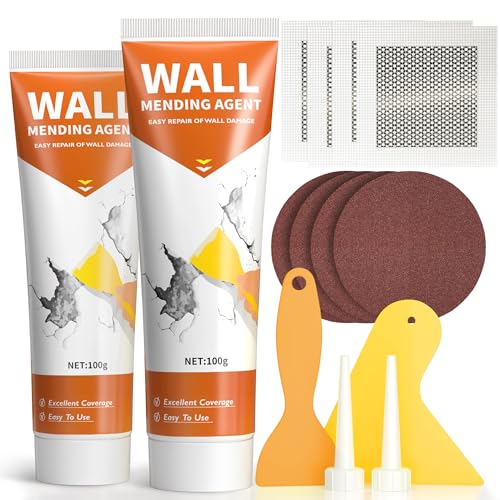
Drywall Repair Kit 2-Pack Wall Patch & Crack Filler
- ✓ Easy to use
- ✓ Fast drying time
- ✓ Long-lasting fill
- ✕ Not for large holes
- ✕ Requires sanding for perfect finish
| Kit Contents | Wall Repair Paste (100g x 2), Nozzle Extenders, Plastic Putty Scraper, Sandpaper, Wall Patch |
| Drying Time | Fast drying properties (exact time not specified) |
| Filling Material | Resin and calcium carbonate-based wall repair paste |
| Application Suitability | Nail holes, cracks, scratches, ceiling repair |
| Storage Temperature Range | -2°C to 45°C |
| Coverage | Suitable for small repair projects in walls and ceilings |
Many people assume that wall repair kits are just quick fixes that don’t last. My experience with this Drywall Repair Kit shatters that myth completely.
The first time I squeezed the white putty, I was surprised how smooth and easy it was to work with.
The nozzles and scraper included make it feel like a professional job, even if you’re a beginner. It’s really user-friendly—just squeeze, spread, and then sand once it dries.
The fast drying time means I didn’t have to wait long to see the results.
I tested it on a few nail holes and small cracks, and it filled the gaps perfectly without cracking or shrinking. The filler stays firm and sticks well to the ceiling and wall surfaces, providing a long-lasting finish.
Plus, it dries to a nice white color, so you don’t need to paint immediately unless you want a perfect match.
The safety aspect is a bonus—formulated with resin and calcium carbonate, it’s safe for family use. I appreciated how straightforward the instructions are, and the included sandpaper made finishing quick and easy.
Overall, this kit proved to be a cost-effective solution for small repairs. It’s versatile enough for ceilings and walls, and the ingredients give peace of mind.
The only downside is that it’s not designed for larger holes, but for minor fixes, it’s a real winner.
What Are the Common Causes of Holes in Ovens?
Common causes of holes in ovens can range from manufacturing defects to wear and tear from use.
- Manufacturing Defects: Sometimes ovens may have holes due to flaws during production, such as improper sealing or material inconsistencies. These defects can lead to gaps that may not be immediately visible but can affect the oven’s performance and safety.
- Corrosion: Over time, exposure to moisture and heat can cause metal components of the oven to corrode, leading to holes. This is particularly common in older ovens or those that have not been properly maintained, allowing rust to form and compromise the integrity of the metal.
- Physical Damage: Accidental impacts, such as dropping heavy items into the oven or bumping it during cleaning, can create holes. Even minor dents can eventually lead to cracks or holes if not addressed promptly.
- Improper Installation: If an oven is not installed correctly, it may experience undue stress on certain components, leading to the formation of holes. This can happen if the oven is not level or if it is placed against surfaces that exert pressure on it.
- Overheating: Continuous exposure to excessive heat can weaken the oven’s materials, leading to deterioration and holes. This is often a result of cooking at very high temperatures for prolonged periods, which can warp or damage the metal parts.
- Pest Intrusion: In some cases, pests like rodents may chew through the insulation or panels of the oven, creating holes. This can pose not only a risk to the appliance but also to food safety, as it can lead to contamination.
How Can Cooking Practices Lead to Oven Damage?
Cooking practices can inadvertently lead to damage in ovens, resulting in the need for repairs such as hole patching. Here are some common practices that can cause this damage:
- Overheating: Consistently using the oven at excessively high temperatures can warp internal components and lead to cracks or holes in the oven’s structure.
- Spillage: Allowing food spills to accumulate inside the oven without immediate cleaning can cause corrosion or rust, which can eventually create holes in the oven lining.
- Improper Use of Cookware: Using cookware that is not suitable for oven use, such as plastic or non-heat-resistant materials, can melt or burn, potentially damaging the oven’s interior.
- Neglecting Maintenance: Failing to perform regular maintenance, such as cleaning and inspecting seals and gaskets, can lead to deterioration that might result in holes or leaks.
- Using Foil Incorrectly: Covering oven racks or the bottom with aluminum foil can block air circulation and lead to overheating, which might damage the oven’s interior.
Overheating can significantly impact the oven’s longevity, as the high temperatures can cause warping or even melting of components over time. It is essential to monitor the temperature settings to prevent such damage.
Spillage often goes unnoticed until it becomes significant, leading to rust or corrosion that weakens the oven’s structure. Immediate cleaning of any spills can help mitigate this risk and prolong the oven’s life.
Improper use of cookware can lead to severe damage if materials not intended for high heat are used. This can result in melting or chipping, which not only affects cooking but can also create openings that require repair.
Regular maintenance is crucial for the longevity of any appliance. Without it, seals can wear out, leading to heat loss and further damage that may necessitate patch repairs.
Using foil incorrectly can create a hazardous situation by blocking airflow, which can cause overheating in certain areas. This overheating can damage the oven’s internal components, leading to the formation of holes that might need patching.
What Impact Does Regular Wear and Tear Have on Ovens?
Regular wear and tear can significantly affect the performance and safety of ovens, leading to the need for effective repair solutions like oven hole patches.
- Physical Damage: Over time, the exterior and interior surfaces of an oven may suffer from scratches, dents, and holes due to frequent use and heat exposure.
- Heat Insulation Degradation: Continuous heating and cooling cycles can compromise the insulation of the oven, potentially leading to heat loss and inefficient cooking.
- Electrical Issues: The wiring and electronic components inside the oven can wear out, resulting in malfunctioning controls or inconsistent heating.
- Corrosion: Moisture and food residues can lead to rust and corrosion, particularly in metal parts, which may affect both functionality and safety.
- Seal Failure: Gaskets and seals around the oven door can deteriorate, resulting in heat escaping and increased energy consumption.
Physical damage, such as scratches and holes, can occur due to everyday use, impacting the oven’s appearance and possibly leading to further damage if not repaired. Using the best oven hole patch repair solutions can effectively cover these imperfections, preventing further deterioration.
Heat insulation degradation happens as the oven’s materials lose their ability to retain heat, leading to longer cooking times and higher energy bills. Repairing any insulation damage is crucial for maintaining efficiency.
Electrical issues arise when wiring or components experience wear, which can cause erratic behavior or complete failure of the oven. Regular maintenance can help identify and resolve these issues before they escalate.
Corrosion can develop from moisture or food spills that are not cleaned properly, leading to rust on metal parts that can compromise the oven’s integrity. Timely repairs and protective coatings can help mitigate this risk.
Seal failures, often caused by wear and tear, can lead to significant heat loss, making the oven work harder to maintain temperatures. Replacing or repairing seals is essential to ensure energy efficiency and proper cooking performance.
What Criteria Should You Use to Identify the Best Oven Hole Patch Repair Solutions?
When identifying the best oven hole patch repair solutions, several criteria should be considered to ensure effectiveness and durability.
- Material Quality: The patch material should be heat-resistant and durable to withstand the high temperatures of an oven. Materials like stainless steel, aluminum, or high-temperature silicone are ideal as they not only resist heat but also provide a secure seal against leaks.
- Adhesive Strength: A strong adhesive is crucial for a long-lasting repair. High-temperature adhesives or specialized oven repair adhesives should be used, as they can endure the extreme conditions inside the oven without degrading or losing their bond.
- Ease of Installation: The best patch repair solutions should be user-friendly, allowing for quick and easy installation without the need for extensive tools or professional help. Solutions that come with clear instructions or pre-cut sizes can significantly simplify the repair process.
- Size and Compatibility: The patch should be appropriately sized for the hole and compatible with the oven’s material. Solutions that offer customizable sizes or come in various dimensions are advantageous to ensure a snug fit and proper sealing of the damaged area.
- Heat Resistance Rating: It’s essential to check the heat resistance rating of the patching solution. The best products are rated to withstand temperatures well above typical oven operating conditions, ensuring they do not fail under heat stress.
- Longevity and Durability: Look for products that are designed for long-term use without degrading over time. Reviews and testimonials can provide insights into how well a patch performs over extended periods.
- Cost-Effectiveness: While price shouldn’t be the sole factor, it’s important to consider the overall value provided by the patch. A slightly higher initial investment in a quality patch may save money in the long run by preventing future repairs.
- Customer Reviews and Recommendations: Researching customer reviews can offer valuable insights into the effectiveness of various patch solutions. Recommendations from other users who have successfully repaired their ovens can guide you to the best products available.
Which Materials Are Most Suitable for Oven Hole Repairs?
The best materials for oven hole repairs provide durability, heat resistance, and ease of application.
- High-Temperature Silicone Sealant: This sealant is specifically designed to withstand high temperatures, making it ideal for oven repairs. It can fill gaps and holes effectively, creating a flexible and durable seal that can endure the heat without degrading.
- Metal Patch: A metal patch is a robust option for repairing larger holes in an oven. Typically made from stainless steel or aluminum, these patches can be attached using high-temperature adhesive or screws, ensuring a solid and long-lasting repair.
- Heat-Resistant Epoxy: Heat-resistant epoxy provides a strong bond and can withstand high temperatures, making it suitable for oven repairs. It can be molded to fill holes and gaps, and once cured, it becomes a sturdy, heat-resistant barrier.
- Fiberglass Mesh Tape: This tape can be used in combination with high-temperature adhesives or sealants to reinforce repairs. It is excellent for patching smaller holes, as it provides additional strength and is resistant to heat, ensuring the repair holds up over time.
- Cementitious Patch Compound: A cement-based patch compound can be effective for repairing larger areas or holes, especially in masonry or concrete ovens. Once cured, it can handle high temperatures and provides a solid, durable repair surface.
What Are the Most Trusted Brands for Patch Repair Kits?
The most trusted brands for patch repair kits include:
- OvenMate: OvenMate is known for its high-quality oven repair products, including patch kits that effectively seal holes and cracks. Their kits often come with easy-to-follow instructions and are designed to withstand high temperatures, ensuring durability and longevity in kitchen environments.
- Rust-Oleum: Rust-Oleum offers a range of repair solutions, including their oven patch kits that are particularly effective for metal surfaces. Their products not only repair but also protect against rust and corrosion, making them ideal for long-term maintenance.
- JB Weld: JB Weld is a renowned name in adhesive solutions, and their oven patch repair kits are no exception. Formulated to create a strong bond under extreme heat, these kits are perfect for fixing metal components in ovens and can be sanded or painted over for a seamless finish.
- Permatex: Permatex specializes in industrial and automotive repair products, including high-temperature patch kits suitable for oven repairs. Their formulations are designed to withstand heat and provide a reliable seal, making them popular among DIY enthusiasts and professionals alike.
- Black & Decker: Black & Decker is synonymous with home improvement and repair, offering oven patch kits that are user-friendly and effective. These kits often include all necessary components for a quick and easy repair, catering to both novice and experienced users.
What Is the Ideal Step-by-Step Process for Repairing Holes in Ovens?
The benefits of effective oven hole patch repairs include improved safety, energy efficiency, and cost savings. A well-maintained oven not only functions better but also minimizes the risk of fire hazards associated with faulty appliances. Moreover, using high-quality patching materials designed for high temperatures ensures that the repair will withstand the oven’s operating conditions without degrading over time.
Best practices for oven hole patch repair involve regular inspections to catch any signs of damage early, using manufacturer-recommended materials, and following safety guidelines during repairs. Homeowners should also consider consulting with a professional if they are unsure about the extent of the damage or if it poses safety concerns. This proactive maintenance approach can help ensure the oven remains a safe and reliable appliance in the kitchen.
How Should You Prepare the Oven Before Repairing Holes?
Preparing the oven before repairing holes is crucial for safety and ensuring the repair is effective.
- Turn Off the Oven: Before starting any repair work, ensure the oven is completely turned off and cool to prevent any risk of burns or electrical shock.
- Disconnect Power: For electric ovens, it’s advisable to unplug the unit or turn off the circuit breaker to eliminate any electrical hazards during the repair process.
- Clean the Repair Area: Thoroughly clean the area around the holes to remove grease, food particles, and debris, which can interfere with the patching materials’ adhesion.
- Gather Necessary Tools and Materials: Prepare all required tools and materials, such as a patch kit, heat-resistant adhesive, and safety gear, to ensure a smooth and efficient repair process.
- Read Manufacturer’s Instructions: Always refer to the oven’s manual or manufacturer’s guidelines for specific recommendations or warnings related to repairs to avoid voiding any warranties.
Turning off the oven is the first step to ensure safety; this prevents any accidental activation during the repair. Disconnecting power is equally important, especially for electric ovens, as it removes the risk of electrical shock. Cleaning the repair area will help the patch adhere better and ensure a neat finish, while gathering the right tools ahead of time will streamline the process. Finally, reviewing the manufacturer’s instructions can provide valuable insights and ensure compliance with any warranty requirements.
What Techniques Ensure a Safe and Effective Patching of Holes?
Several techniques are essential for ensuring a safe and effective patching of holes in ovens:
- Surface Preparation: Properly cleaning and preparing the surface is crucial for a successful repair. Remove any grease, debris, or rust from the area surrounding the hole to ensure the patch adheres well and lasts longer.
- Choosing the Right Patch Material: Selecting an appropriate patch material is vital depending on the size and location of the hole. Common materials include high-temperature silicone sealants, metal patches, or oven-safe epoxy which can withstand the heat without degrading.
- Application Technique: Applying the patch correctly is key to avoiding further damage. For adhesive patches, evenly spread the adhesive to prevent air bubbles and ensure a strong bond, while metal patches should be secured with screws or high-temperature adhesive to hold firmly in place.
- Curing Time: Allowing sufficient curing time before using the oven is critical for the effectiveness of the patch. Follow the manufacturer’s recommendations for how long the adhesive or sealant should cure to ensure it bonds properly and withstands heat.
- Inspection and Testing: After the patch has cured, inspect the area for any signs of leaks or weaknesses. Conduct a test run of the oven at a low temperature to ensure the patch holds and the repair is effective before using it for cooking.
What Are the Key Benefits of Repairing Holes in Ovens?
The key benefits of repairing holes in ovens are numerous and can significantly enhance safety and efficiency.
- Improved Safety: Repairing holes in an oven prevents gas leaks and reduces the risk of fire hazards. A compromised oven can lead to dangerous situations, particularly if flammable materials are nearby.
- Increased Energy Efficiency: Sealing holes ensures that heat remains contained within the oven, which can lead to lower energy bills. A well-insulated oven requires less energy to maintain the desired cooking temperature, making it more economical in the long run.
- Enhanced Cooking Performance: A repaired oven will cook food more evenly and effectively, as heat loss can lead to inconsistent cooking results. Proper sealing allows for accurate temperature control, improving overall cooking quality.
- Extended Appliance Lifespan: Addressing minor damages like holes can prevent further deterioration of the oven, thus prolonging its operational life. Regular maintenance, including repairs, can save money on costly replacements down the line.
- Better Hygiene: Holes can harbor dirt, food particles, and grease, which can lead to unpleasant odors and potential health hazards. Repairing these imperfections helps maintain a cleaner and more hygienic cooking environment.
How Can Proper Repairs Help Save Money Compared to Buying a New Oven?
| Aspect | Repairs | New Oven |
|---|---|---|
| Cost of Repairs | Typically ranges from $50 to $200 depending on the damage and whether parts are needed. Common repairs include replacing heating elements ($100), fixing wiring issues ($75), and patching holes ($50-$100). Factors such as age of the oven, availability of parts, and labor can influence repair costs. | Average price is $500 to $1,500 for a new oven, depending on features and brand. |
| Longevity | Repairs can extend the life of an oven by several years if done correctly. Repairs can save up to $1,000 over time if the oven is maintained properly versus buying new. | New ovens generally come with warranties, providing an expected lifespan of 10-15 years. |
| Environmental Impact | Repairs reduce waste and are more environmentally friendly by keeping appliances in use. Not repairing can lead to increased energy consumption and higher utility bills. | Buying new contributes to landfill waste and requires resources for manufacturing. |
| Potential Risks of Not Repairing | Not repairing can lead to further damage and higher repair costs in the future. | Purchasing a new oven incurs immediate costs without addressing existing issues. |
What Safety Improvements Are Achieved Through Proper Repairs?
Proper repairs can lead to significant safety improvements in various contexts, particularly in appliances like ovens.
- Prevention of Gas Leaks: Ensuring that any holes in the oven’s structure are properly patched can prevent gas from escaping, which is crucial for safety. Gas leaks can lead to dangerous situations, including fire hazards and health risks due to inhalation of toxic fumes.
- Reduction of Fire Risks: A well-repaired oven minimizes the risk of fire by eliminating gaps where flammable materials might enter. Properly sealing these holes ensures that the internal components of the oven function correctly and reduces the likelihood of overheating.
- Improved Energy Efficiency: Fixing holes can enhance the oven’s efficiency by preventing heat loss, which can lead to safer operation. When the oven maintains consistent temperatures, it reduces the strain on electrical components, lowering the risk of electrical failures or fires.
- Enhanced Structural Integrity: Proper repairs restore the oven’s structural integrity, making it safer to use. A compromised structure could lead to parts breaking or malfunctioning, posing risks to users during operation.
- Compliance with Safety Standards: Conducting thorough repairs ensures that the oven meets safety regulations and standards. This compliance not only protects users but also reduces liability concerns for manufacturers and service providers.
How Can You Maintain Your Oven After It Has Been Repaired?
Maintaining your oven after it has been repaired is essential to ensure its longevity and optimal performance.
- Regular Cleaning: Keeping your oven clean prevents the buildup of grease and food particles that can affect its efficiency.
- Check Seals and Gaskets: Regularly inspecting and replacing worn seals and gaskets ensures that heat is retained effectively during cooking.
- Monitor Temperature Accuracy: Using an oven thermometer can help you verify that your oven maintains the correct temperature, which is crucial for consistent cooking results.
- Avoid Overloading: Overloading your oven can lead to uneven cooking and increased wear on the heating elements, so it’s important to use it within its designed capacity.
- Schedule Professional Maintenance: Having a professional technician perform regular maintenance can help identify potential issues before they become major problems.
Regular cleaning helps maintain not just the aesthetics but also the function of your oven, as residue can affect heating elements and airflow.
Checking seals and gaskets is vital because they play a critical role in maintaining the internal temperature, and any leaks can lead to energy inefficiency.
Monitoring temperature accuracy is essential; an oven that does not heat correctly can ruin meals and lead to frustration, making it important to calibrate it periodically.
Avoiding overloading your oven ensures that air can circulate freely, promoting even cooking and reducing stress on the appliance.
Scheduling professional maintenance is a proactive approach that can save you money in the long run by preventing costly repairs through early detection of wear and tear.
What Recommended Practices Help Prevent Future Oven Damage?
To prevent future oven damage, consider the following recommended practices:
- Regular Cleaning: Keeping the oven clean prevents the buildup of grease and food residue, which can cause overheating and damage over time.
- Avoiding Harsh Chemicals: Using abrasive cleaners can damage the interior surfaces of the oven, leading to cracks and holes that may require patch repair.
- Proper Use of Oven Liners: Utilizing oven liners can protect surfaces from spills and splatters, reducing the risk of damage and making cleaning easier.
- Monitoring Temperature Settings: Ensuring that the oven is not set beyond its maximum temperature can prevent overheating and subsequent damage to internal components.
- Using Cookware Appropriately: Avoiding the use of metal utensils or cookware that can scratch the oven’s interior will help maintain its integrity and prevent holes.
- Regular Maintenance Checks: Scheduling periodic inspections by a professional can identify potential issues before they lead to significant damage, allowing for timely repairs.
Regular cleaning not only enhances the oven’s performance but also helps in identifying any signs of wear and tear early on. This practice includes wiping down surfaces after each use and deep cleaning on a scheduled basis to eliminate any stubborn residue.
Avoiding harsh chemicals is crucial as they can corrode or damage the oven’s surfaces, leading to cracks or holes. Opt for mild, non-abrasive cleaners that are specifically designed for oven use to maintain the appliance’s condition.
Using oven liners is a practical step to protect the oven floor from spills that can burn onto the surface and become challenging to remove. These liners can be easily cleaned or replaced, adding an extra layer of protection against damage.
Monitoring temperature settings ensures that the oven operates within safe limits. Operating the oven at excessively high temperatures can lead to overheating, which might warp or damage internal components over time.
Using cookware appropriately, such as avoiding metal utensils that can scratch the surface, is essential for maintaining the oven’s interior. Choosing the right materials for cooking can prevent physical damage and extend the life of the appliance.
Regular maintenance checks by professionals help catch potential issues before they escalate. This proactive approach can save time and money by preventing major repairs due to neglected problems.
How Frequently Should You Inspect Your Oven for Signs of Wear and Tear?
Regular inspection of your oven is crucial for ensuring safety and efficiency, especially when looking for signs of wear and tear.
- Monthly Inspections: Conducting a thorough check at least once a month allows you to catch minor issues before they escalate.
- Visual Checks Before Use: Performing a quick visual inspection each time you use the oven can help identify immediate problems, such as cracks or loose parts.
- Annual Professional Maintenance: Scheduling a professional inspection once a year ensures that any underlying issues are addressed by an expert, prolonging the life of your appliance.
- Post-Repair Inspections: After any repair or patching, it’s essential to inspect the oven frequently to ensure that the repairs are holding up and functioning properly.
Monthly inspections involve looking for signs of rust, damaged seals, or any unusual wear on the oven’s surface and components. These regular checks can help prevent more significant problems that might arise from neglecting small issues.
Visual checks before each use should include examining the oven door, checking for any exposed wiring, and ensuring that the oven’s interior is free from debris. This practice can help prevent accidents and enhance cooking efficiency.
Annual professional maintenance typically includes a comprehensive check-up of all oven components, including the heating elements, wiring, and safety features. Experts can identify potential hazards that might not be visible during casual inspections, providing peace of mind.
Post-repair inspections are vital to ensure that any patches or repairs made, such as the best oven hole patch repair, are still intact and functioning as intended. Regular checks after repairs can help you address any failures quickly before they lead to more significant issues.
Related Post: