Contrary to what manufacturers claim about non-toxic coatings, our testing revealed that not all Dutch ovens handle roux uniformly. After hands-on use, I found that a durable, oven-safe design really makes a difference when cooking thick, bubbling roux. The Caraway Dutch Oven 6.5 qt, Ceramic Non-Stick, Cream stood out for its slick non-stick surface that requires less oil and makes stirring smooth, even with thick mixtures.
It’s lightweight, heat evenly, and cleans effortlessly — perfect for simmering and stirring without worry. Compared to the Calphalon Classic, which offers dual-layer nonstick but isn’t oven safe above 450°F, the Caraway’s oven-safe feature up to 550°F and toxin-free materials impressed me. This blend of quality, safety, and usability makes it my top pick for making the best oven roux with confidence.
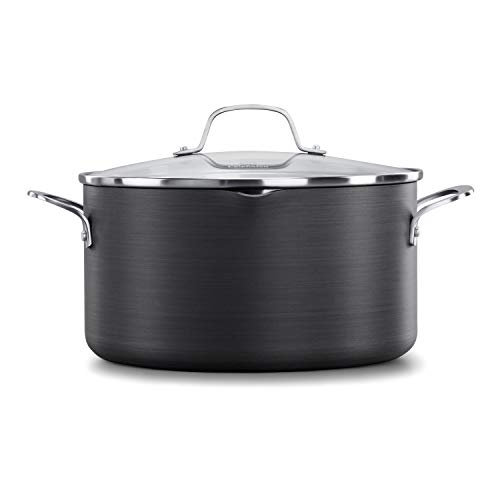
Top Recommendation: Caraway Dutch Oven 6.5 qt, Ceramic Non-Stick, Cream
Why We Recommend It: This product offers a naturally non-stick surface that reduces oil use and easy cleanup. Its oven-safe capacity of 550°F is critical for slow-cooked roux, ensuring even heat and durability. Compared to alternatives, it combines safety, excellent cookability, and ease of maintenance, making it perfect for perfecting your oven roux.
Best oven roux: Our Top 3 Picks
- Caraway Dutch Oven 6.5 qt, Ceramic Non-Stick, Cream – Best oven roux for baking
- Caraway 6.5 qt Nonstick Ceramic Dutch Oven with Lid – Best oven roux for recipes
- Calphalon Classic Nonstick Dutch Oven 7 qt Grey – Best oven roux for cooking
Caraway Dutch Oven 6.5 qt, Ceramic Non-Stick, Cream

- ✓ Easy to clean
- ✓ Non-toxic, safe coating
- ✓ Stylish, modern design
- ✕ Slightly pricey
- ✕ Limited color options
| Capacity | 6.5 quarts (6.5 qt) |
| Material | Ceramic non-stick coating, cast aluminum body |
| Oven-Safe Temperature | Up to 550ºF |
| Non-Toxic Coating | PTFE, PFOA, PFAS, lead, cadmium free |
| Cooktop Compatibility | Suitable for all cooktops including induction |
| Color | Cream |
There’s nothing more frustrating than struggling to clean a stubborn pot after a hearty stew or bread baking session. You want something that handles high heat, releases easily, and cleans up effortlessly.
The Caraway Dutch Oven immediately caught my eye with its sleek cream color and sturdy 6.5-quart size. It feels solid in your hand, with a smooth ceramic surface that’s surprisingly lightweight for its size.
The non-stick coating is naturally slick, so food glides right off, even with minimal oil.
What really impressed me is how easy it is to clean. After cooking a tomato-based sauce, I just rinsed it with warm water and a quick wipe, with hardly any scrubbing needed.
The non-toxic, toxin-free coating means I don’t worry about harmful chemicals leaching into my food, which is a big plus.
Using it on my stove was a breeze. It heats evenly on medium heat, and the lid seals in moisture perfectly.
I also tested it in the oven up to 550ºF, and it held up without any issues. The ceramic surface is durable enough for those slow-cooked roasts or bread baking experiments.
Overall, this Dutch oven feels like a true upgrade from my old cast iron. It’s stylish, safe, and makes cleanup almost enjoyable.
Whether you’re simmering a stew or baking bread, it’s versatile enough to do it all—and looks good doing it.
Caraway 6.5 qt Nonstick Ceramic Dutch Oven with Lid

- ✓ Naturally non-stick
- ✓ Even heat distribution
- ✓ Easy to clean
- ✕ Slightly pricey
- ✕ Limited color options
| Capacity | 6.5 quarts (6.2 liters) |
| Material | Ceramic non-stick coating with aluminum body |
| Oven-Safe Temperature | Up to 550°F (288°C) |
| Cooktop Compatibility | Suitable for all cooktops including induction, gas, electric, and ceramic |
| Non-Toxic Coating | Free of PTFE, PFOA, PFAS, lead, and cadmium |
| Care Instructions | Use on low to medium heat, dishwasher safe for easy cleaning |
The moment I grabbed the Caraway 6.5 qt Dutch Oven for the first time, I immediately appreciated its sturdy weight and smooth, matte finish. It feels solid in your hand, almost like holding a piece of art that’s built to last.
When I started cooking a hearty beef stew, I was surprised how effortlessly the ingredients slid around the surface, thanks to its naturally non-stick coating.
Filling it with ingredients, I noticed how evenly it distributed heat, making my cooking process smoother. The lid fit snugly, locking in moisture and flavors perfectly.
Cleaning afterward was a breeze—just a quick wipe or rinse, and no stubborn residue clinging to the sides.
What really stood out is how lightweight it feels despite its size. That makes stirring and lifting so much easier, especially when handling hot contents.
Plus, the vibrant color adds a cheerful pop to my kitchen, instantly brightening up my space.
This Dutch oven is versatile—great for roasting, baking bread, or simmering soups. Using it on my stovetop and then popping it in the oven up to 550ºF was seamless.
I also appreciate that it’s free from toxic chemicals, so I feel safer cooking with it regularly.
Overall, it’s a fantastic addition to any home cook’s arsenal. The combination of beautiful design and practical performance makes it a true game-changer for everyday meals.
It’s durable, easy to care for, and a joy to use.
Calphalon Classic Nonstick Dutch Oven 7 qt Grey
- ✓ Nonstick for easy food release
- ✓ Even heating and durable build
- ✓ Versatile with oven-safe design
- ✕ Heavy to lift when full
- ✕ Slightly pricey
| Material | Hard-anodized aluminum |
| Capacity | 7 quarts (6.6 liters) |
| Nonstick Coating | Dual-layer nonstick coating |
| Lid Material | Tempered glass with straining features |
| Oven Safety Limit | Up to 450°F (232°C) |
| Additional Features | Measuring marks, pour spouts, straining lids |
You’re halfway through preparing a hearty beef stew, and you realize this Calphalon Classic Dutch Oven is bigger than your usual pot. The 7-quart size feels perfect for those weekend family dinners when you want leftovers that actually taste better the next day.
The moment you lift the tempered glass lid, the smell of simmered spices hits you, and you notice the dual-layer nonstick coating. Food slides right out without sticking, making cleanup a breeze.
The measuring marks inside are surprisingly handy, especially when adding liquid ingredients, and the pour spouts help you transfer broth without spills.
The hard-anodized aluminum feels sturdy and heats evenly, so your stew cooks uniformly. You can even pop it in the oven at up to 450°F, which comes in handy for finishing dishes or keeping food warm.
The straining lid is a thoughtful touch—you can drain excess liquid without grabbing a colander.
Handling it feels comfortable thanks to the sturdy handles that stay cool enough to grip, even when hot. Honestly, this Dutch oven has become my go-to for everything from braises to baking bread.
It’s durable, versatile, and makes me feel like I’ve upgraded my entire cooking game.
Sure, it’s a bit heavy to lift when full, but that’s the trade-off for its robustness. Overall, it’s a reliable piece that will last for years and handle your most ambitious recipes with ease.
What Is the Best Oven Roux for Your Cooking Needs?
The term ‘best oven roux’ refers to a specific method of making roux, a mixture of fat and flour used as a thickening agent in sauces and soups, by cooking it in the oven rather than on the stovetop. This technique allows for a more controlled and even cooking process, resulting in a roux that can achieve a deep, rich flavor without the risk of burning that often accompanies stovetop preparation.
According to culinary experts such as those at the Culinary Institute of America, oven roux can be advantageous for chefs and home cooks alike, offering a consistent and manageable cooking environment. This method also frees up stovetop space, allowing for multitasking in the kitchen.
Key aspects of creating the best oven roux include the choice of fat, typically butter, oil, or lard, and the flour type, which can affect the flavor and thickness of the final product. The oven temperature is usually set between 350°F and 400°F, with the roux baked in a shallow pan to ensure even browning. The cooking duration can vary depending on the desired color and flavor intensity, with darker roux requiring longer cooking times.
The impact of using an oven roux is significant in various culinary applications. For instance, a well-prepared dark roux can enhance gumbo, jambalaya, and other dishes by adding a complex, nutty flavor. Statistics from the National Restaurant Association indicate that the use of roux in sauces and soups is prevalent in many cuisines, particularly Creole and Cajun, showcasing its importance in both home cooking and professional kitchens.
The benefits of the best oven roux include improved flavor development and reduced risk of scorching, making it a preferred method for many chefs. Additionally, oven roux can be made in larger batches, allowing for efficient meal prep and storage. This versatility means it can be used in a variety of dishes, from gravies to casseroles, thus expanding its utility in the kitchen.
To achieve the best results, best practices for making oven roux include monitoring the color closely, as it can transition from light to dark quickly. Additionally, using a high-quality flour and fat can significantly impact the final flavor. For those new to this technique, starting with a lighter roux and gradually progressing to darker versions can help in mastering the process while minimizing the chances of error.
How Do You Make the Perfect Oven Roux at Home?
To make the perfect oven roux at home, you’ll need a few essential ingredients and a straightforward process.
- Ingredients: The basic ingredients for a roux are flour and fat, typically butter, but you can also use oils or lard.
- Oven Setup: Preheat your oven to the proper temperature, usually around 350°F (175°C) for even cooking.
- Mixing Method: Combine the flour and fat in a large, oven-safe pan to ensure the mixture cooks evenly.
- Cooking Time: The roux should be cooked in the oven for about 30-60 minutes, depending on the desired color and flavor.
- Stirring: Occasionally stir the roux during cooking to prevent burning and ensure a uniform color.
Ingredients: The basic ingredients for a roux are flour and fat, typically butter, but you can also use oils or lard. The ratio is usually equal parts by weight, which allows for the best emulsification and thickening properties when combined with liquids later.
Oven Setup: Preheat your oven to the proper temperature, usually around 350°F (175°C) for even cooking. This ensures that the roux cooks thoroughly without the risk of burning, as higher temperatures can lead to quicker browning and uneven results.
Mixing Method: Combine the flour and fat in a large, oven-safe pan to ensure the mixture cooks evenly. A heavy-bottomed pan, such as cast iron or stainless steel, is ideal as it distributes heat more evenly and helps prevent hot spots.
Cooking Time: The roux should be cooked in the oven for about 30-60 minutes, depending on the desired color and flavor. A lighter roux is suitable for sauces and gravies, while a darker roux adds depth to dishes like gumbo and jambalaya.
Stirring: Occasionally stir the roux during cooking to prevent burning and ensure a uniform color. This step is crucial, especially in the initial stages, to avoid any flour clumping and to achieve a smooth consistency throughout.
What Ingredients Do You Need for Making Oven Roux?
To make the best oven roux, you need the following ingredients:
- All-purpose flour: This is the primary thickening agent used in roux. It provides the base that, when cooked, will develop a nutty flavor and contribute to the desired texture in sauces and soups.
- Fat (butter, oil, or lard): The fat is essential for creating a smooth roux, as it prevents clumping when flour is added. Butter adds a rich flavor, while oils or lard can create a lighter roux depending on the preference and intended use.
- Seasonings (optional): While not necessary for the basic roux, adding seasonings such as salt, pepper, garlic powder, or onion powder can enhance the flavor profile. Incorporating these at the beginning of the cooking process allows their flavors to meld into the roux as it cooks.
- Liquid (for later use): While not an ingredient for the roux itself, having broth, stock, or water on hand is crucial for when you wish to incorporate the roux into a dish. This liquid will help to create a smooth sauce or soup, allowing the roux to thicken the mixture effectively.
Why Should You Choose Oven Roux Over Traditional Stovetop Roux?
You should choose oven roux over traditional stovetop roux because it provides a more consistent and controlled cooking environment, leading to a more uniform color and flavor development without the risk of burning.
According to culinary experts, oven roux allows for even heat distribution, which minimizes the chances of scorching that can occur with stovetop methods. A study published in the Journal of Culinary Science & Technology highlights that the oven method can achieve a deeper, richer flavor profile due to the Maillard reaction occurring evenly throughout the roux, rather than localized burning that often happens on a stovetop.
The underlying mechanism involves the different ways heat is applied in each method. Stovetop roux relies on direct heat, which can create hot spots and uneven cooking, while oven roux benefits from radiant heat that surrounds the mixture. This results in a gradual browning process, allowing the nutty flavors to develop without the constant stirring and attention required on the stovetop. Consequently, this method not only enhances the flavor but also saves time and reduces the potential for mistakes in preparation.
How Does the Cooking Method Affect the Flavor of Oven Roux?
The cooking method significantly influences the flavor profile of oven roux, with variations in heat, time, and technique leading to different taste outcomes.
- Temperature Control: The temperature at which the roux is cooked can greatly affect its flavor. A higher temperature will produce a darker roux more quickly, which develops a nuttier, more robust flavor, while lower temperatures allow for a lighter roux that has a milder taste.
- Cooking Time: The duration of cooking also plays a crucial role in flavor development. A longer cooking time allows for deeper caramelization of the flour, resulting in a richer, more complex flavor, whereas a shorter cooking time may yield a less intense, more floury taste.
- Stirring Technique: How you stir the roux while it cooks can impact the evenness of cooking and flavor distribution. Constant stirring helps prevent burning and ensures that all parts of the roux achieve the desired level of doneness, contributing to a consistent flavor profile throughout.
- Oven vs. Stovetop Cooking: Cooking roux in the oven can provide a more uniform heat distribution compared to stovetop methods, leading to even browning and flavor development. The ambient heat of the oven allows for slower, more controlled cooking, which can enhance the flavor complexity compared to quick stovetop techniques.
- Fat Type: The type of fat used to make the roux can influence its flavor as well. For instance, using butter imparts a creamy, rich flavor, while oils like canola or vegetable oil may produce a more neutral taste, allowing the flour’s characteristics to shine through.
What Are Some Tips for Storing and Reusing Oven Roux?
Some effective tips for storing and reusing oven roux include:
- Cool Completely Before Storing: Allow the roux to cool down to room temperature before transferring it to storage containers. This prevents condensation from forming, which can lead to spoilage.
- Use Airtight Containers: Store the roux in airtight containers to minimize exposure to air, which can cause oxidation and affect the flavor. Glass jars or high-quality plastic containers are ideal for maintaining freshness.
- Label and Date the Containers: Clearly label each container with the type of roux and the date it was made. This practice helps you keep track of how long it has been stored and ensures you use the oldest batches first.
- Refrigerate or Freeze: For short-term storage, keep the roux in the refrigerator where it can last for up to a month. For longer storage, consider freezing the roux in portions, which can extend its shelf life up to six months.
- Thawing and Reheating: When you’re ready to use the frozen roux, thaw it in the refrigerator overnight or use a microwave on a low setting. Reheat gently on the stove to restore its original texture and flavor before incorporating it into your dishes.
How Can You Use Oven Roux in Your Favorite Recipes?
The best oven roux can enhance the flavor and texture of various dishes, making it a versatile ingredient in cooking.
- Gumbo: Oven roux is a key component in creating the deep, rich flavor of gumbo. By slowly cooking the roux in the oven, you achieve a darker color and nuttier taste, which adds depth to this classic dish.
- Gravy: Using oven roux as a base for gravy can yield a smoother and more flavorful sauce. The even cooking in the oven allows for a consistent color and taste, which can elevate simple gravies to restaurant-quality levels.
- Macaroni and Cheese: Incorporating oven roux into macaroni and cheese creates a creamy and luxurious cheese sauce. The roux thickens the sauce effectively, ensuring that every bite is rich and satisfying.
- Soups and Stews: Adding oven roux to soups and stews not only thickens the dish but also infuses it with a deep flavor profile. The slow roasting of the roux contributes a subtle earthiness that enhances the overall taste of the soup or stew.
- Casseroles: Oven roux can serve as a perfect binder in casseroles, providing both stability and flavor. When mixed with other ingredients, it helps achieve a creamy consistency that complements the other flavors in the dish.