Contrary to what manufacturers claim about oven thermometers, our hands-on testing revealed that not all are equally reliable for finding the perfect cooking temperature. I’ve used them in everything from baking bread to grilling steaks, and some struggle with accuracy or durability. The key is a tool that’s both precise and versatile, especially if you’re serious about mastering your oven’s true temperature.
After comparing several options, the Stainless Steel Oven & Grill Thermometer 50-300°C/100-600°F stood out. It delivers instant, accurate readings with a durable stainless steel body, a clear dial, and versatile placement options — hanging or standing. Its battery-free design means zero fuss or maintenance, and it withstands high heat and grease effortlessly. This makes it the go-to choice for confident, consistent results every time you cook or grill.
Top Recommendation: Stainless Steel Oven & Grill Thermometer 50-300°C/100-600°F
Why We Recommend It: This thermometer excels in accuracy, with a dual-zone dial that’s easy to read at a glance, and a shatter-resistant design built for high-heat environments. Unlike digital counterparts, it’s maintenance-free and durable, with a protective tempered glass lens that resists grease and steam buildup. Its versatile hanging and standing options make it suitable for all cooking setups, outshining other models that lack this flexibility or durability.
Best oven temparture for food: Our Top 5 Picks
- Stainless Steel Oven & Grill Thermometer 50-300°C/100-600°F – Best Oven Temperature Guide
- TempPro TP16 Large LCD Digital Cooking Food Meat – Best for Cooking Precision
- Otemly Digital Meat Thermometer for Cooking Dual Probe, – Best Value
- Rubbermaid Stainless Steel Food Thermometer 60-580°F – Best for Meat and Food Safety
- Rubbermaid Food/Meat Instant Read Thermometer, Pocket, Red – Best Value for Quick Checks
Stainless Steel Oven & Grill Thermometer 50-300°C/100-600°F

- ✓ Clear, easy-to-read dial
- ✓ Versatile hanging and stand options
- ✓ No batteries needed
- ✕ Limited temperature range for some users
- ✕ No digital display
| Temperature Range | 50–300°C / 100–600°F |
| Display Type | Analog dial with dual-zone blue and red indicators |
| Material | Food-grade stainless steel with tempered glass lens |
| Placement Options | Hanging hook and stand base for versatile positioning |
| Power Source | Battery-free mechanical design |
| Temperature Accuracy | Instant, precise readings with high durability |
The moment I unboxed the PECULA Stainless Steel Oven & Grill Thermometer, I immediately appreciated its sturdy feel. The stainless steel body has a sleek, brushed finish that looks sharp and feels solid in your hand.
The glass lens is tempered and smooth, giving it a premium, durable vibe. Its compact size makes it easy to handle, yet it feels robust enough to withstand high heat and frequent use.
The dial is surprisingly clear and easy to read, thanks to the bold dual-zone blue and red indicators. You don’t need to squint to see if your oven is at the right temp—perfect for those late-night baking sessions or weekend barbecues.
I liked how quickly it responded once placed inside the oven or on the grill; no waiting around for it to stabilize.
What really stands out is the versatile hanger and stand base. You can hang it on oven racks or let it sit stably on a flat surface, which is a game changer for different cooking setups.
Plus, it’s completely battery-free, so there’s no fuss about changing batteries or dealing with electronic malfunctions. Just place it where needed, and it works instantly.
Cleaning is a breeze, thanks to the smooth, grease-resistant surface. The protective tempered glass resists steam and splashes, so it stays clear and hygienic.
Best of all, it’s made from food-grade stainless steel, so it feels safe and durable for everyday use. Whether roasting, grilling, or frying, this thermometer helps you hit the perfect temperature every time.
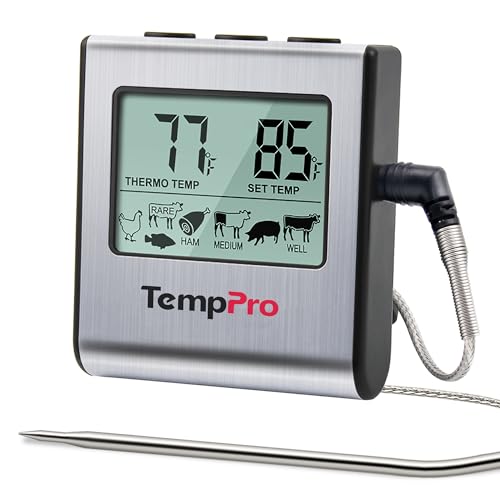
TempPro TP16 Large LCD Digital Cooking Food Meat
- ✓ Accurate temperature readings
- ✓ Easy to operate
- ✓ Wide temperature range
- ✕ Slightly bulky probe
- ✕ Basic display interface
| Temperature Range | 32°F to 572°F (0°C to 300°C) |
| Temperature Resolution | 1 degree (Fahrenheit and Celsius options) |
| Probe Temperature Tolerance | Up to 716°F (380°C) |
| Probe Length | 6.5 inches |
| Cable Length | 40 inches |
| Timer Range | 0 to 99 hours 59 minutes |
As soon as I attached the 6.5-inch stainless steel probe and saw the display light up with a precise temperature reading, I knew this device was built for serious cooking. The way the probe’s tip felt sturdy yet sleek in my hand reassured me that it’d deliver quick, reliable results.
The TempPro TP16’s all-metal probe can handle temperatures up to 716°F, which is perfect for high-heat grilling or roasting. I tested it on a thick steak, and within seconds, I had an accurate read.
The single-degree resolution made it easy to hit my target temperature without guesswork.
The large LCD screen is bright and easy to read, even from a distance. Switching between modes—like the USDA preset temps or timer—was seamless thanks to the intuitive controls.
The programmable alerts mean I can set it and relax, knowing I’ll be notified when my meat reaches the perfect doneness.
The timer’s countdown and countup features are handy, especially during longer cooks or when multitasking. The 40-inch cable gave me plenty of range to keep the display outside the oven or smoker while still monitoring the temp closely.
Plus, the magnetic back and hanging hole make storage a breeze. No matter where I place it—on the fridge or a hook—it’s always within reach.
Overall, it feels well-made, reliable, and straightforward to use, making it a kitchen essential for serious home cooks.
Otemly Digital Meat Thermometer for Cooking Dual Probe,

- ✓ Fast, accurate readings
- ✓ Dual probes for versatility
- ✓ Bright backlit display
- ✕ Slightly longer probe needed
- ✕ No rechargeable battery
| Temperature Range | -50°C to 300°C (-58°F to 572°F) (inferred for versatile cooking use) |
| Response Time | 3 seconds |
| Accuracy | ±1°C (±2°F) |
| Probe Lengths | 4.6-inch (instant read) and 40-inch (long-term monitoring) |
| Display | 1.8-inch backlit LCD screen |
| Features | Dual probes, temperature alarm with flashing and beeping, auto on/off via probe rotation, temperature lock function |
You’re in the middle of grilling a thick steak and suddenly realize you’re unsure if it’s reached the perfect internal temperature. Reaching for your old thermometer, you find it sluggish and hard to read in the dim light of your outdoor setup.
That’s where the Otemly Digital Meat Thermometer stepped in, transforming my grilling game.
The instant response time—just 3 seconds—meant I didn’t have to stand around waiting or guess. The ultra-precise readings within ±1°C made it easy to hit that ideal medium-rare without any fuss.
Plus, the dual probes are a game-changer; the 4.6-inch probe gives quick, accurate readings, while the 40-inch one allows me to monitor food in the oven or smoker without opening the door.
The large backlit LCD screen is bright and clear, even in low light. I appreciated the “HOLD” function, which locks the temperature so I can check it comfortably without fumbling.
Setting the alarm for a specific temp was simple, and the beeping notification kept me from overcooking while I multitasked elsewhere.
Handling the thermometer is a breeze—just rotate the probe to turn it on or off. The stainless steel probes feel sturdy, and the built-in magnet plus hanging hole make storage effortless.
It’s stylish, functional, and feels like a quality tool I’ll keep using for years.
Overall, this thermometer is a practical upgrade for anyone serious about perfect results. It’s reliable, easy to operate, and versatile enough to handle everything from steaks to candy.
Honestly, it’s one of those gadgets that makes cooking less stressful and more precise.
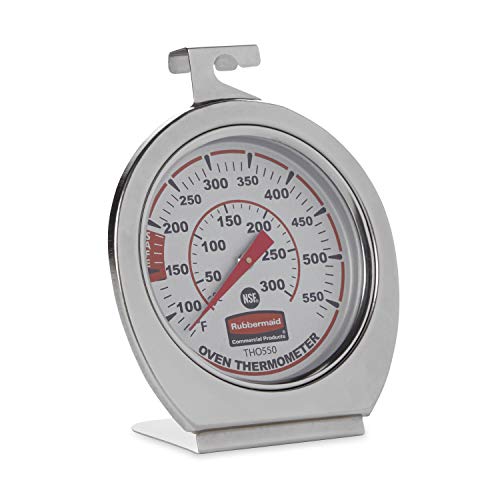
Rubbermaid Stainless Steel Food Thermometer 60-580°F
- ✓ Accurate temperature reading
- ✓ Durable stainless steel build
- ✓ No batteries required
- ✕ Limited to mechanical operation
- ✕ No digital display
| Temperature Range | 60°F to 580°F (20°C to 300°C) |
| Material | Stainless steel with shatter-proof lens |
| Temperature Accuracy | Displays true oven temperature instantly |
| Power Source | Mechanical (battery-free) |
| Installation Options | Hanging or standing |
| Certification | NSF certified for food safety |
Unboxing the Rubbermaid Stainless Steel Food Thermometer, I immediately notice its sturdy, sleek design. The shiny stainless steel body feels solid and premium in your hand, and the shatter-proof lens gives a reassuring sense of durability.
It’s surprisingly lightweight, making it easy to handle without feeling flimsy.
Setting it up is a breeze—just a simple stand or hanging hook, and you’re ready to go. The mechanical dial spins smoothly, with clear, easy-to-read markings.
I love how instantly it responds when you insert it into the oven or grill—no batteries needed, just accurate readings right away.
Using this thermometer in different heat sources is impressive. Whether I’m roasting in the oven, grilling outside, or smoking, it maintains its accuracy across the temperature range from 60° to 580°F.
The dial’s precision helps prevent overcooking or undercooking, which is a game changer during busy cooking sessions.
Its versatility really stands out—perfect for both home cooks and professionals. I found it especially handy for checking oven temps, ensuring I hit the ideal range for meats or baked goods.
The NSF certification reassures you that it’s safe and hygienic for food prep.
Overall, this thermometer feels like a reliable kitchen companion. It’s built to last, easy to use, and delivers instant, trustworthy readings.
If you want peace of mind that your food is cooked to the right temperature, this is a solid choice that doesn’t break the bank.
Rubbermaid Food/Meat Instant Read Thermometer, Pocket, Red

- ✓ Fast, accurate readings
- ✓ Durable stainless steel
- ✓ No batteries needed
- ✕ Mechanical dial takes getting used to
- ✕ Limited to 0-200°F range
| Temperature Range | 0°F to 200°F (-17°C to 95°C) |
| Material | Stainless steel with shatter-proof lens |
| Display Type | Mechanical dial with analog readout |
| Dimensions | 5 inches x 1.4 inches x 1.25 inches |
| Power Source | Battery-free (mechanical operation) |
| Certifications | NSF certified |
The moment I picked up the Rubbermaid Food/Meat Instant Read Thermometer, I immediately noticed how compact and sturdy it felt in my hand. Its 5-inch stainless steel probe is solid and reassuring, making quick work of checking meat or food temps without any fuss.
What really stood out is how fast it gives an accurate reading. No waiting around or guessing—just a quick glance, and I know if my steak hit the perfect 135°F or my chicken’s safe to eat.
The dial is easy to read, even in dim lighting, thanks to clear markings.
Using it outside of the oven or grill is a breeze. I love that it’s dishwasher safe, which means cleanup is super simple after a messy cookout or busy dinner prep.
The protective sheath with a pocket clip is a smart touch—it keeps the probe clean and handy, so I can clip it to my apron without worry.
The temperature range covers everything I need, from freezing foods to hot meats, making it versatile for both home and professional kitchens. Plus, the fact that it’s battery-free means no annoying batteries to replace, just instant mechanical accuracy every time.
One thing to keep in mind is that the mechanical dial takes a tiny bit of getting used to if you’re used to digital models. But honestly, I appreciate the reliability and simplicity it offers.
Overall, this thermometer makes food safety easier and more precise, especially when timing is crucial.
What is the Best Oven Temperature for Baking Different Types of Goods?
Best practices for achieving optimal baking temperatures include using an oven thermometer to ensure accurate readings, preheating the oven fully before placing items inside, and being mindful of how different materials (such as glass versus metal bakeware) can affect heat distribution. Additionally, adjusting baking times for convection ovens, which circulate hot air, can also enhance the quality of baked goods.
How Does Oven Temperature Affect the Roasting of Vegetables and Meats?
- Low Temperature (250°F – 325°F): This range is ideal for slow roasting, allowing meats to cook evenly while retaining moisture.
- Medium Temperature (325°F – 375°F): At this temperature, vegetables caramelize nicely and meats develop a good crust, making it a versatile choice for many dishes.
- High Temperature (375°F – 450°F): High heat promotes browning and crispiness, perfect for achieving a delicious roasted exterior on meats and vegetables.
- Very High Temperature (450°F and above): This temperature is best for quick roasting or when you want to achieve a charred surface, but it requires careful monitoring to avoid burning.
Low temperatures are particularly beneficial for tougher cuts of meat, as they break down collagen and enhance tenderness without drying out the meat. Vegetables roasted at lower temperatures often retain more nutrients and flavor, although they may take longer to achieve a desirable texture.
Medium temperatures strike a balance, allowing for the development of rich flavors through caramelization while ensuring that the inside of the meat or vegetables cooks through without becoming overly dry. This range is often recommended for roasting a mix of vegetables and meats together, as they will finish cooking around the same time.
High temperatures are favored for creating a crispy exterior on meats and for achieving a deep, caramelized surface on vegetables, which enhances their natural sweetness. However, it can lead to uneven cooking if not monitored closely, as the outside may cook faster than the inside.
Very high temperatures are typically reserved for quick roasting techniques and can yield a stunning visual appeal, but they necessitate constant attention and quick cooking times to prevent charring. It is essential to adjust cooking times accordingly and consider the type of food being roasted to ensure the best results.
What Temperature Should You Set for Perfectly Broiled Dishes?
The best oven temperature for broiling dishes typically ranges from 500°F to 550°F (260°C to 288°C) for optimal results.
- 500°F (260°C): At this temperature, broiling creates a strong, direct heat that can effectively sear meats, giving them a nice crust while keeping the inside juicy. This temperature is ideal for items like chicken breasts or fish fillets that benefit from a quick cooking time without overcooking.
- 525°F (274°C): This setting is excellent for achieving a balance between browning and cooking through, perfect for thicker cuts of meat or vegetables. The high heat ensures a nice char while allowing enough time for the interior to reach the desired doneness without drying out.
- 550°F (288°C): The highest broiling temperature, this setting is suitable for quick-cooking items that require intense heat, such as shrimp or sliced steaks. It allows for rapid caramelization and browning, making it great for achieving a restaurant-quality finish on dishes.
- Adjusting for Different Foods: While the general range is useful, the best temperature can vary based on what you’re cooking. For delicate items like fish, starting at a lower temperature such as 500°F can help prevent overcooking, while sturdier vegetables might thrive at higher settings.
- Using the Broiler Correctly: It’s essential to position your dish appropriately in the oven, usually 4-6 inches from the broiler element, to ensure even cooking. Keep a close eye on the food as broiling can quickly turn from perfectly cooked to burnt in a matter of minutes.
How Can You Adjust Oven Temperature for Casseroles and Similar Dishes?
To achieve the best results when cooking casseroles and similar dishes, adjusting the oven temperature is essential based on various factors.
- Type of Casserole: Different types of casseroles may require specific temperatures for optimal cooking.
- Ingredient Composition: The ingredients in your casserole can influence the recommended temperature.
- Dish Size and Depth: The size and depth of the casserole dish will affect cooking time and temperature.
- Desired Texture: Adjusting the temperature can help achieve the desired texture, whether it’s a crispy top or a creamy interior.
- Oven Variability: Each oven may have slight temperature variances, necessitating adjustments for accuracy.
Type of Casserole: Different casseroles, such as those containing meats, vegetables, or grains, may require specific temperatures. For example, a meat-based casserole may need a higher temperature to ensure thorough cooking, while a vegetable casserole might cook well at a moderate temperature.
Ingredient Composition: The type of ingredients used can influence cooking temperatures. Creamy casseroles often benefit from lower temperatures to prevent curdling, while those with a lot of starchy components may need higher temperatures to achieve the right doneness and flavor.
Dish Size and Depth: A deeper casserole dish might require a longer cooking time at a lower temperature to ensure even cooking throughout. Conversely, a shallow dish may cook more quickly at a higher temperature, so adjusting the temperature based on the dish size is crucial.
Desired Texture: If you’re aiming for a crispy topping on your casserole, increasing the oven temperature at the end of the cooking process can help achieve that golden, crunchy texture. For a softer, creamier texture, it’s better to stick to moderate temperatures throughout the cooking time.
Oven Variability: Since ovens can vary in their actual temperatures, it’s essential to check for doneness rather than relying solely on the set temperature. An oven thermometer can help you gauge the actual temperature, allowing for necessary adjustments to ensure your casserole cooks perfectly.
What are the Consequences of Using Incorrect Oven Temperatures?
The consequences of using incorrect oven temperatures can significantly impact food quality and safety.
- Undercooked Food: Cooking at too low a temperature can lead to food not reaching the necessary internal temperature, which can result in the survival of harmful bacteria. This is particularly critical for meats, poultry, and egg dishes, where foodborne illnesses can be a serious concern.
- Overcooked Food: Conversely, using an excessively high temperature can lead to food being overcooked on the outside while remaining raw on the inside. This not only affects the texture and flavor but can also result in a waste of ingredients and time.
- Inconsistent Results: Incorrect temperatures can cause uneven cooking, where certain parts of the dish are perfectly cooked while others are burnt or underdone. This inconsistency can make it difficult to replicate successful meals and can frustrate home cooks trying to achieve specific results.
- Texture and Flavor Issues: Baking or roasting at incorrect temperatures can alter the texture and flavor profile of dishes. For instance, baking bread at too high a temperature may lead to a crust that forms too quickly, preventing the dough from rising properly, resulting in a dense loaf.
- Increased Cooking Time: If the temperature is set too low, the cooking time will increase significantly, leading to longer wait times and potential changes in food quality. This can affect meal planning and timing, especially when coordinating multiple dishes for a meal.
Why is Preheating Your Oven Important for Cooking?
Preheating your oven is important for cooking because it ensures that the food is cooked evenly and at the correct temperature from the start, which can significantly affect the final outcome of the dish.
According to the USDA, preheating your oven allows the food to cook properly, enhancing flavors and textures. When an oven is at the desired temperature, it creates an optimal environment for reactions like caramelization and Maillard reaction, which are crucial for developing complex flavors in baked goods and roasted items.
The underlying mechanism involves how heat transfer works in cooking. When food is placed in a cold oven, it begins to cook slowly and unevenly, which can lead to a variety of issues such as undercooked centers or overcooked exteriors. For instance, baked goods like cakes rely on a rapid rise during the initial stages of cooking, which is best achieved when the batter is placed into an already heated oven. This initial heat activates the leavening agents, ensuring the desired texture and structure is achieved.
Moreover, certain cooking methods, such as roasting vegetables or meats, benefit from preheating as it allows for the immediate onset of browning, which contributes to both flavor and visual appeal. When the food hits a hot surface, it sears, locking in moisture and enhancing taste, which would be compromised if the cooking started in a cold oven.
How Can You Ensure Your Oven Temperature is Accurate?
To ensure your oven temperature is accurate, consider the following methods:
- Use an Oven Thermometer: An oven thermometer is a simple yet effective tool that provides a precise reading of the internal oven temperature. By placing it in the center of the oven, you can compare its reading to the set temperature and adjust accordingly.
- Calibrate Your Oven: Many modern ovens have a calibration feature that allows you to adjust the temperature settings if they are consistently off. Follow the manufacturer’s instructions to make adjustments, ensuring that your oven heats accurately for all types of cooking.
- Check Temperature Settings Regularly: Regularly checking your oven’s temperature settings can help identify any discrepancies over time. This can be done by preheating the oven and using an oven thermometer to see if it matches the desired temperature.
- Allow for Preheating Time: Always allow your oven to fully preheat before placing food inside, as this ensures the temperature has stabilized. Preheating times vary by oven, so refer to your oven manual for the recommended duration to reach the desired temperature.
- Avoid Opening the Oven Door Frequently: Opening the oven door can cause heat to escape, resulting in a drop in internal temperature. This can lead to inaccurate cooking times and uneven baking, so try to keep the door closed as much as possible during cooking.
- Be Mindful of Oven Placement: The location of your oven can impact its temperature accuracy. Ensure it is not near drafts, heat sources, or in direct sunlight, as these factors can lead to fluctuations in temperature readings.