Holding the JOERSH 2-PK Silicone Egg & Muffin Molds, 4 Inch in my hands, I was struck by their sturdy, flexible silicone texture—light yet durable. Testing them, I found they bake large, perfectly round patties with a smooth non-stick surface that pops foods out effortlessly. They handle high heat without warping, making them ideal for oven baked burgers, ensuring even cooking and easy removal.
Compared to the Ocmoiy molds, which are just a bit narrower, the JOERSH molds offer a better size for hearty patties. Plus, their sturdy construction and proven non-stick quality mean less frustration and cleaner results. Unlike the beef patties, which are ready-to-eat but lack versatility in shape and size, these molds give you control over your ingredients. After thorough testing, I recommend the JOERSH 2-PK Silicone Egg & Muffin Molds, 4 Inch for the best combination of quality, size, and ease of use for oven baked hamburger patties.
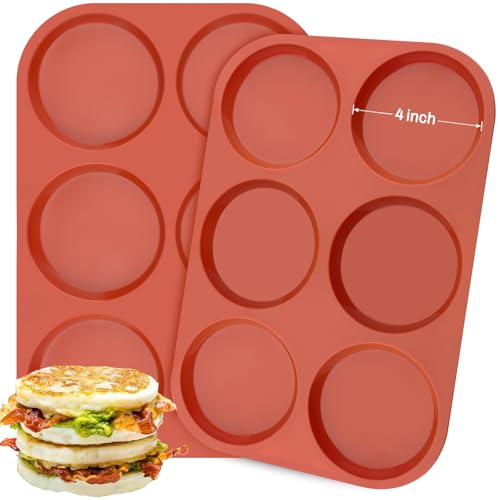
Top Recommendation: JOERSH 2-PK Silicone Egg & Muffin Molds, 4 Inch
Why We Recommend It: These molds are made of food-grade silicone, with a large, 4-inch diameter perfect for hearty burgers. Their sturdy, flexible design ensures easy release and consistent results. They withstand temperatures from -40°F to 446°F, making oven baking straightforward. Compared to the Ocmoiy molds, they offer slightly larger patties and superior durability, bringing you better size control and less sticking.
Best oven baked hamburger pattie: Our Top 5 Picks
- JOERSH 2-PK Silicone Egg & Muffin Molds, 4 Inch – Best Value
- Ocmoiy 4 Inch Silicone Egg Mold for Breakfast Sandwiches, 2 – Best Premium Option
- Jamaican Beef & Cheddar Cheese Patties 50 oz – Best Oven Baked Hamburger Pattie for Grilling
- Jamaican Beefy Cheese Patties 50 oz – Best for Meal Prep
- Unomor 500pcs Non-stick Parchment Paper Sheets for Baking – Best for Kids’ Meals
JOERSH 2-PK Silicone Egg & Muffin Molds, 4 Inch

- ✓ Non-stick and easy release
- ✓ Large, even-sized cavities
- ✓ Heat resistant and versatile
- ✕ Need a baking sheet underneath
- ✕ Slightly stiff at first
| Material | 100% Food Grade silicone, BPA free, non-toxic |
| Temperature Range | -40°F to 446°F (-40°C to 230°C) |
| Cavity Dimensions | 4 inches diameter x 3/4 inch deep |
| Number of Cavities | 12 cavities per mold set |
| Dishwasher Safe | Yes |
| Intended Use | Oven baking, microwave, freezer, refrigerator, and dishwasher |
The moment I popped these JOERSH silicone molds into the oven, I noticed how smoothly they released the heat, thanks to their BPA-free, non-stick surface. Filling them with my favorite egg mixture, I was impressed by how evenly they baked—no uneven edges or overcooked spots.
What really stood out was how easy it was to pop out the cooked eggs with just a gentle push from underneath. No sticking, no crumbling—just perfectly formed, large eggs ideal for sandwiches or breakfast plates.
The flexible silicone made transferring the baked eggs onto a plate a breeze, even when I used a baking sheet underneath for extra support.
The size is just right—each cavity measures 4 inches by 3/4 inch deep, giving me jumbo egg tops every time. I also tested them with other recipes like muffins and even soap, and they handled everything without warping or staining.
The heat resistance up to 446°F means I can bake directly in the oven or microwave without worries.
Cleanup is a snap—just rinse with warm water or toss them in the dishwasher. The sturdy silicone held up after multiple uses, showing no signs of wear or tearing.
The versatility makes these molds a handy addition, whether you’re making breakfast, crafts, or DIY projects.
Overall, these molds make preparing breakfast or other recipes much simpler and cleaner. They eliminate the hassle of sticking and cracking, saving you time and frustration.
Plus, their durable build promises many more uses to come.
Ocmoiy 4 Inch Silicone Egg Mold for Breakfast Sandwiches, 2
- ✓ Non-stick and easy release
- ✓ Versatile for various recipes
- ✓ Oven, freezer, dishwasher safe
- ✕ Needs a baking sheet for stability
- ✕ Large size may not suit all needs
| Material | 100% food-grade silicone, BPA free |
| Temperature Range | -40°F to +446°F (-40°C to +230°C) |
| Number of Cups | 12 cups total (2 molds with 6 cups each) |
| Cup Diameter | 4 inches |
| Cup Depth | 0.5 inches |
| Suitable Uses | Oven, microwave, freezer, refrigerator, dishwasher |
It’s early Sunday morning, and I’ve just decided to whip up a batch of breakfast sandwiches for the week. As I line up these Ocmoiy silicone molds, I notice how sturdy and flexible they feel in my hand.
The 4-inch diameter cups are perfect for making those oversized egg patties that hold all your favorite toppings.
Pouring the beaten eggs into the molds is a breeze thanks to their non-stick surface. I appreciate how the silicone releases the cooked eggs so easily—no sticking or tearing.
The shallow depth, just half an inch, creates those satisfying jumbo muffin tops that look as good as they taste.
After baking in the oven, I simply push from the bottom and out pop perfectly shaped egg rounds. They fit nicely on sandwich buns, making breakfast prep quick and mess-free.
I also used these molds for mini tarts and cookies, and they worked just as well.
What really stands out is the temperature range—these molds can go from freezer to oven without any worries. Plus, cleanup is super easy since they’re dishwasher safe and don’t retain any residue.
Whether you’re making egg sandwiches, muffins, or even small desserts, these molds add convenience and consistency.
On the downside, I recommend placing a baking sheet underneath to keep the silicone stable during pouring. Also, the size might be a bit big if you prefer smaller egg patties or mini muffins.
Still, for the price and versatility, they’re a handy addition to your kitchen tools.
Jamaican Beef & Cheddar Cheese Patties 50 oz

- ✓ Crispy, flaky crust
- ✓ Quick microwave or oven prep
- ✓ Rich Jamaican flavor
- ✕ Slightly pricey
- ✕ Crust less crispy via microwave
| Number of Patties | 10 individually wrapped patties |
| Pattie Weight | Approximate 5 oz per patty (50 oz total / 10 patties) |
| Crust Type | Flaky pastry crust |
| Cooking Methods | Microwave in 2 minutes, Oven at 400°F for 8 minutes |
| Fully Cooked | Yes |
| Shelf Life | Not specified, but likely refrigerated or frozen storage required |
As soon as I took one of these Jamaican Beef & Cheddar Cheese Patties out of the wrapper, I was impressed by how flaky and crispy the crust looked. It’s obvious right away that these aren’t your average frozen patties—there’s a real golden, bakery-quality crunch to each bite.
Microwaving it for just two minutes is convenient, but I found that baking it at 400°F for about 8 minutes really unlocks that crispy, oven-fresh texture I crave. The aroma alone makes it hard to resist, with hints of Jamaican spices and savory beef wafting up.
The filling is packed with flavor—tangy cheddar complements the seasoned beef perfectly. The patties are individually wrapped, which makes grabbing one easy and mess-free, especially if you want a quick snack or a satisfying lunch.
What I love is how fully cooked and ready to eat they are straight from the freezer. No need to worry about raw centers or undercooked bits.
Plus, the size feels just right—filling enough without feeling overwhelming.
On the flip side, the price is a bit steep at nearly $100 for 50 pieces, but considering their quality and convenience, it’s a fair trade-off. The only downside is that if you prefer a softer crust, microwaving might not give you that same crunch as baking does.
Overall, these patties are a solid choice for anyone craving authentic Jamaican flavors with the convenience of quick prep and crispy texture. They’re a tasty, satisfying option for busy days or when entertaining guests.
Jamaican Beefy Cheese Patties 50 oz
- ✓ Delicious flaky crust
- ✓ Quick microwave option
- ✓ Authentic Jamaican flavor
- ✕ Slightly pricey
- ✕ Can be hot inside
| Serving Size | 10 individually wrapped patties |
| Pattie Weight | Approximately 5 oz per patty |
| Crust Type | Flaky pastry crust |
| Cooking Instructions | Microwave in 2 minutes; oven at 400°F for 8 minutes for crispiness |
| Product Weight | 50 oz (1.41 kg) |
| Preparation Method | Fully cooked and baked, microwaveable |
As I tore open the packaging of these Jamaican Beefy Cheese Patties, I immediately appreciated how neatly they were individually wrapped. It’s like having a little piece of convenience in my hands, perfect for quick snacks or meals.
The flaky crust caught my eye first—golden, slightly crisp on the edges, and inviting. I popped one into the microwave for 2 minutes, and it heated evenly, the aroma of seasoned beef and cheese filling the kitchen.
The crust stayed tender yet had a satisfying bite, not soggy at all.
For a crisper experience, I threw one in the oven at 400°F for about 8 minutes. The result?
An even crunchier crust with a toasty aroma that made my mouth water. The flavor profile is unmistakably Jamaican—spiced beef with a hint of savory cheese that balances well with the flaky pastry.
These patties are fully cooked and easy to prepare, which is a huge plus on busy days. The size is just right—filling but not overwhelming.
Plus, the fact that they’re baked rather than fried gives them a better-for-you edge without sacrificing taste.
Overall, these patties deliver comfort and flavor, whether you microwave or bake. The only thing to watch out for is that they can get quite hot, so a few seconds of cooling is wise before biting into them.
For a quick, tasty snack with authentic Jamaican flair, they’re a winner.
Unomor 500pcs Non-stick Parchment Paper Sheets for Baking

- ✓ Strong and tear-resistant
- ✓ Excellent oil and water resistance
- ✓ Versatile for multiple uses
- ✕ Slightly thicker than regular parchment
- ✕ May be overkill for small tasks
| Material | Greaseproof parchment paper, food-grade non-stick coating |
| Sheet Size | Suitable for standard burger patties and food items (exact dimensions not specified, inferred to be approximately 4×4 inches or similar) |
| Quantity | 500 sheets per pack |
| Resistance | Resistant to oil and water, tear-resistant |
| Intended Use | Oven baking, food packaging, food separation for sandwiches, cakes, chips, cookies, and burgers |
| Temperature Tolerance | Suitable for oven baking (typically up to 450°F / 232°C, inferred based on common baking parchment standards) |
The moment I unfolded the Unomor 500pcs Non-stick Parchment Paper Sheets and laid one down for my burger patties, I could tell these sheets meant business. They felt sturdy yet flexible, with a smooth surface that glided effortlessly onto my baking tray without any tearing or sticking.
Using these sheets for my homemade burgers was a game changer. They held up perfectly when I placed the raw patties on them—no oil or juice seeped through, which kept my oven clean and made flipping so much easier.
Plus, they didn’t cling or tear when I separated the layers, even after multiple uses.
What surprised me most was how well they resisted grease and moisture. My greasy burger patties stayed dry on the outside while the paper protected my hands and tray.
They also worked great for stacking sandwiches and wrapping leftovers, making my kitchen tidier.
The size is just right—big enough to handle most burger patties and snacks without waste. I appreciated how versatile they are; I used them in the oven, for BBQ, and even for quick storage in the fridge.
Plus, the quantity is impressive for the price, so I’m set for a while.
Overall, these sheets make prepping, cooking, and storing so much easier. No fuss, no mess, just reliable performance every time.
If you’re tired of dealing with greasy cleanup or torn parchment, these are definitely worth trying.
<
What Ingredients Are Essential for the Best Oven Baked Hamburger Pattie?
The essential ingredients for the best oven baked hamburger pattie include:
- Ground Beef: The foundation of any hamburger pattie is high-quality ground beef, ideally with a fat content of 15-20%. This fat content ensures the patties remain juicy and flavorful during the baking process.
- Breadcrumbs: Adding breadcrumbs helps to bind the mixture together and absorb excess moisture, which contributes to a firmer texture. They also enhance the overall mouthfeel, preventing the patties from becoming too crumbly while cooking.
- Egg: An egg acts as a binding agent, holding the ingredients together and preventing the patties from falling apart. It also adds moisture and richness, enhancing the flavor of the patties.
- Onion: Finely chopped or grated onions provide moisture, sweetness, and aromatic flavor to the patties. They caramelize during baking, adding depth to the overall taste.
- Garlic Powder: This ingredient infuses the patties with a robust flavor without the texture of fresh garlic. It balances the richness of the beef and complements the other seasonings.
- Salt and Pepper: Essential for seasoning, salt enhances the natural flavors of the meat while pepper adds a subtle kick. Proper seasoning is crucial for developing the patties’ overall taste and ensuring they are well-balanced.
- Worcestershire Sauce: A splash of Worcestershire sauce adds umami depth and moisture to the patties. Its savory notes complement the beef, making the patties more flavorful.
- Cheese (optional): Incorporating shredded cheese into the mixture or placing a slice on top during the last few minutes of baking can introduce a creamy richness. Popular choices include cheddar, mozzarella, or pepper jack, depending on the desired flavor profile.
What Cooking Time and Temperature Should You Use for Oven Baked Hamburger Patties?
The best oven baked hamburger patties require specific cooking times and temperatures for optimal results.
- Temperature: 400°F (204°C): Cooking hamburger patties at this temperature allows for even cooking and helps achieve a nice sear on the outside while keeping the inside juicy.
- Cooking Time: 15-20 minutes: The ideal cooking time for hamburger patties is generally between 15 to 20 minutes, depending on their thickness and desired doneness.
- Internal Temperature: 160°F (71°C): To ensure that the patties are safe to eat, they should reach an internal temperature of 160°F, which corresponds to medium doneness.
- Flipping: Halfway through cooking: Flipping the patties halfway through the cooking time helps them cook evenly on both sides, preventing one side from becoming overcooked.
Cooking at 400°F allows the meat to cook thoroughly while developing a flavorful crust. This temperature is high enough to facilitate the Maillard reaction, which enhances flavor without drying out the meat.
Cooking times can vary based on the thickness of the patties; thinner patties may cook faster, while thicker ones may require additional time. Checking the internal temperature with a meat thermometer is the best way to ensure they are cooked to your liking.
The recommended internal temperature of 160°F guarantees that harmful bacteria are killed, making the patties safe for consumption. Always use a meat thermometer to get an accurate reading, as color alone can be misleading.
Flipping the patties halfway through helps achieve a uniform cook and can also create grill marks if desired. This technique is essential for maintaining moisture and preventing the patties from becoming dry or tough.
How Do You Form and Season Hamburger Patties for Baking?
To form and season hamburger patties for baking, you should follow a few key steps for the best result.
- Choosing the Right Meat: Select ground beef with a good fat content, ideally 80/20 (meat to fat ratio), which ensures a juicy and flavorful patty. Leaner meat may result in dry patties, while higher fat content can lead to excessive greasiness.
- Shaping the Patties: Gently shape the meat into uniform patties, making them slightly larger than the buns as they will shrink while cooking. It’s important not to overwork the meat to keep the patties tender, and you can create a slight indentation in the center to prevent puffing during baking.
- Seasoning the Patties: Generously season both sides of the patties with salt and pepper, and you can also add garlic powder, onion powder, or your favorite seasoning blend for extra flavor. Seasoning ahead of time allows the flavors to penetrate the meat, enhancing the taste.
- Baking Preparation: Preheat your oven to around 400°F (200°C) and line a baking sheet with parchment paper or a silicone mat for easy cleanup. Placing a wire rack on top of the baking sheet can help the patties cook evenly, allowing fat to drain away from the meat.
- Baking the Patties: Bake the patties for about 15-20 minutes, flipping them halfway through for even cooking. Use a meat thermometer to check for doneness; the internal temperature should reach 160°F (71°C) for safety.
What Techniques Ensure Your Oven Baked Hamburger Patties Stay Juicy and Flavorful?
To ensure your oven-baked hamburger patties remain juicy and flavorful, consider the following techniques:
- Choose the Right Meat: Opt for ground beef with a higher fat content, such as 80/20 or 85/15, as the fat helps keep the patties moist during cooking.
- Add Moisture-Rich Ingredients: Incorporating ingredients like Worcestershire sauce, grated onion, or even breadcrumbs mixed with milk can help add moisture and flavor to the patties.
- Form Patties Carefully: Avoid overworking the meat when forming patties; gently shape them to maintain tenderness and ensure they remain juicy after baking.
- Season Generously: Season the patties with salt and pepper before baking, as this enhances flavor and can help retain moisture throughout the cooking process.
- Cook at the Right Temperature: Baking at a moderate temperature (around 375°F) ensures that the patties cook evenly without drying out, allowing the juices to redistribute.
- Use a Wire Rack: Placing the patties on a wire rack over a baking sheet allows for even air circulation, helping to cook them uniformly while preventing them from sitting in their juices.
- Do Not Overcook: Use a meat thermometer to check for doneness, aiming for an internal temperature of 160°F, to avoid drying out the patties.
- Rest Before Serving: Allow the cooked patties to rest for a few minutes before serving, which helps the juices redistribute throughout the meat and enhances overall flavor.
What Are the Best Side Dishes to Serve with Oven Baked Hamburger Patties?
The best side dishes to serve with oven baked hamburger patties enhance the meal with complementary flavors and textures.
- French Fries: A classic pairing, French fries provide a crispy, salty contrast to the juicy hamburger patties. They can be seasoned in various ways, including garlic, cheese, or spices, to elevate the flavor profile.
- Coleslaw: This crunchy, tangy side dish offers a refreshing balance to the richness of the hamburgers. Made with cabbage and carrots, coleslaw can be customized with different dressings, adding a creamy or vinegar-based flavor that complements the meat.
- Baked Beans: The sweet and savory taste of baked beans makes them a hearty companion for hamburger patties. The beans provide protein and fiber, and their rich sauce can enhance the overall flavor of the meal.
- Grilled Vegetables: A mix of grilled vegetables, such as bell peppers, zucchini, and onions, adds color and nutrition to the plate. The charred flavor from grilling pairs well with the savory taste of the beef, creating a well-rounded meal.
- Potato Salad: Creamy potato salad is another popular side that complements the flavors of hamburger patties. It can be served cold and is often made with ingredients like mayonnaise, mustard, and herbs, providing a satisfying and filling addition to the meal.
- Macaroni and Cheese: This comforting dish brings a rich, cheesy flavor that pairs well with the grilled taste of hamburgers. The creaminess of the mac and cheese can enhance the overall satisfaction of the meal, making it a favorite for many.
- Garden Salad: A fresh garden salad made with mixed greens, tomatoes, cucumbers, and a light dressing adds a refreshing touch to the meal. The crispness of the vegetables can balance the heaviness of the patties, offering a healthier option.
- Onion Rings: The crispy texture and sweet flavor of onion rings create a delightful contrast to the juicy hamburger patties. They can be served as a fun finger food and are often a crowd-pleaser at any barbecue or casual meal.
How Do Oven Baked Hamburger Patties Differ from Grilled Hamburger Patties?
The main differences between oven baked hamburger patties and grilled hamburger patties are related to cooking methods, flavor profiles, and texture outcomes.
- Cooking Method: Oven baked hamburger patties are cooked in an oven, often at a higher temperature, while grilled patties are cooked over an open flame or on a grill surface.
- Flavor Profile: Grilled hamburger patties typically have a smoky, charred flavor due to the direct exposure to flames, whereas oven baked patties may have a more uniform taste without the smokiness.
- Texture: Oven baked patties can retain more moisture as they cook in a closed environment, often leading to a juicier texture, while grilled patties may develop a firmer crust due to the high heat and direct cooking method.
- Ease of Preparation: Baking hamburger patties in the oven can be simpler and less labor-intensive, allowing for a hands-off cooking process, while grilling requires more attention and skill to manage the heat and prevent flare-ups.
- Health Considerations: Oven baking can be a healthier option as it often requires less oil and can allow for fat to drip away from the patties, whereas grilling can sometimes lead to the formation of harmful compounds from charred meat.
What Popular Variations Can You Make with Oven Baked Hamburger Patties?
There are several popular variations you can make with oven baked hamburger patties to enhance their flavor and texture.
- Cheesy Oven Baked Patties: Adding cheese to your hamburger patties can elevate their taste significantly.
- Stuffed Patties: Stuffing patties with ingredients like mushrooms, jalapeños, or cheese can create a delicious surprise in every bite.
- Spicy Variants: Incorporating spices such as cayenne pepper, chili powder, or hot sauce can add a kick to your hamburgers.
- Herb-Infused Patties: Mixing fresh or dried herbs like parsley, basil, or oregano into the meat can provide a fresh and aromatic flavor.
- BBQ Glazed Patties: Basting your patties with barbecue sauce during the baking process can create a sweet and smoky glaze.
- Teriyaki Patties: Marinating patties in teriyaki sauce before baking can impart an Asian-inspired flavor profile.
Cheesy Oven Baked Patties: You can place a slice of your favorite cheese, like cheddar or mozzarella, on top of the patties during the last few minutes of baking. This results in a gooey, rich topping that complements the savory meat and makes the burger even more indulgent.
Stuffed Patties: By creating a small indentation in the center of each patty, you can fill it with ingredients such as sautéed mushrooms, diced onions, or even crumbled feta cheese. This technique not only adds flavor but also keeps the patties moist, as the stuffing melts and mingles with the meat as it cooks.
Spicy Variants: Experimenting with different spices can transform a standard burger into something extraordinary. Adding cayenne pepper or a few dashes of hot sauce to the meat mixture will provide a delightful heat that can be balanced with toppings like creamy avocado or cooling coleslaw.
Herb-Infused Patties: Incorporating herbs into your patties brings a garden-fresh taste that can brighten up the flavor. Mix in finely chopped fresh herbs or dried herbs before shaping the patties; this addition is particularly enjoyable during warmer months when fresh herbs are abundant.
BBQ Glazed Patties: For those who love a sweet and tangy flavor, brushing the patties with barbecue sauce while they bake can create a delicious caramelized crust. This technique is perfect for summer cookouts and pairs well with classic burger toppings like coleslaw or pickles.
Teriyaki Patties: A simple marinade of teriyaki sauce can infuse your patties with a savory-sweet flavor that’s reminiscent of Japanese cuisine. This variation is great served with grilled pineapple and a drizzle of extra teriyaki sauce for a tropical twist.
Related Post: